How to Seal Burnt Wood
Sealing burnt wood is an important step in preventing further damage and restoring the appearance of the wood. While many commercial sealants are available, you can also use various household items to achieve the same result. In this post, we’ll show you how to seal burnt wood using some common methods. Read on to find out which one is best for your needs!

What Is Burnt Wood?
When wood is exposed to fire, it undergoes a chemical change that makes it more brittle and dry. This can cause the wood to crack, warp, or split. While these changes may not be immediately apparent, they can make the wood more susceptible to damage over time. Sealing burnt wood helps to protect it from further deterioration.
The sealant creates a barrier that prevents moisture from entering the wood and causing it to rot. In addition, the sealant helps to preserve the wood’s natural beauty, keeping it looking like new for years to come. For these reasons, sealing burnt wood is important in protecting your investment.
Why Should You Seal Burnt Wood?
When wood is burned, it undergoes a chemical change that makes it more brittle and less resistant to water. As a result, untreated burnt wood is more likely to warp, crack, or otherwise deteriorate over time. Sealing burnt wood helps to protect it from the elements and extends its lifespan. In addition, sealing burnt wood can also help to restore its natural color and beauty.
When choosing a sealant for burnt wood, be sure to select one that is compatible with the type of wood you are working with. For best results, apply the sealant in several thin coats, allowing each coat to dry completely before applying the next. With proper care and sealing, burned wood can last for many years.
7 Steps to Follow on How to Seal Burnt Wood
Step 1: Remove Any Debris from The Area
The first step is to remove any debris from the area. This includes ashes, soot, and anything else that may be on the wood. Next, you will need to sand the area down. Be sure to use fine-grit sandpaper so that you don’t damage the wood. Once you have sanded the area, you must clean it with a clean cloth.
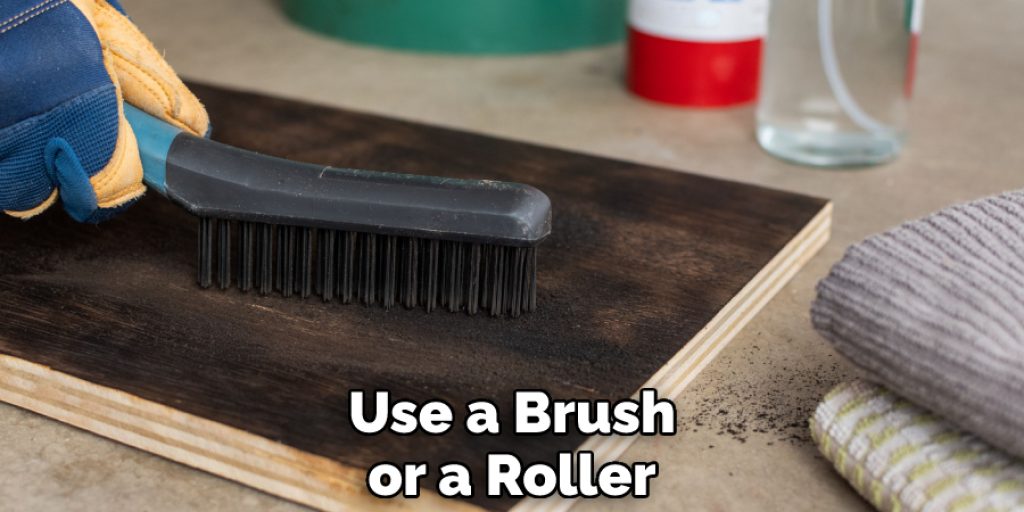
Step 2: Apply The Sealant
Once you have prepared the area, you can now apply the sealant. You will want to use a brush or a roller to apply the sealant evenly. Be sure to read the sealant instructions to know how long it needs to dry. Once it is dry, you can then apply a second coat if necessary.
Step 3: Let The Sealant Dry
After you have applied the sealant, you will need to let it dry. This usually takes about 24 hours. Once it is dry, you can then proceed to the next step.
Step 4: Apply The Stain
Once the sealant is dry, you can now apply the stain. You will want to use a brush or a roller to apply the stain evenly. Be sure to read the stain instructions to know how long it needs to dry. Once it is dry, you can then apply a second coat if necessary.
Step 5: Let The Stain Dry
After you have applied the stain, you will need to let it dry. This usually takes about 24 hours. Once it is dry, you can then proceed to the next step.
Step 6: Apply The Finish
Once the stain is dry, you can now apply the finish. You will want to use a brush or a roller to apply the finish evenly. Be sure to read the instructions on the finish so that you know how long it needs to dry. Once it is dry, you can then apply a second coat if necessary.
Step 7: Let The Finish Dry
After you have applied the finish, you will need to let it dry. This usually takes about 24 hours. Once it is dry, your project is now complete!
That’s it! You’ve now learned how to seal burnt wood. Be sure to follow these steps, so your project turns out just how you want it to!
How to Seal a Fireplace Surround from Burning Wood
Installing a fireplace surround is a great way to add a touch of elegance to your home. However, it’s important to seal the surround properly to prevent fire and smoke damage. First, clean the surface of the surround with a mild detergent. Next, apply a layer of masonry sealer with a brush or roller. Be sure to follow the manufacturer’s instructions for drying time. Once the sealer is dry, you can apply a layer of paint or stain if desired.
Finally, place a layer of fireplace insert glass over the fireplace’s opening. This will protect the surround from direct contact with flames and hot coals. By taking these simple steps, you can enjoy your fireplace worry-free.
The Best Sealants for Protecting Your Wood from Damage
Wood is a beautiful and versatile material, but it can be vulnerable to damage from water, insects, and other environmental threats. A good sealant can help to protect your wood surfaces from damage, keeping them looking great for years to come. There are a few different types of sealants available on the market, each with its own advantages. For example, water-based sealants are easy to apply and protect against water damage.
Oil-based sealants provide a more durable finish that is resistant to scratches and scuffs. However, they can be more difficult to apply evenly. Regardless of which type of sealant you choose, be sure to follow the manufacturer’s instructions carefully to ensure the best results.
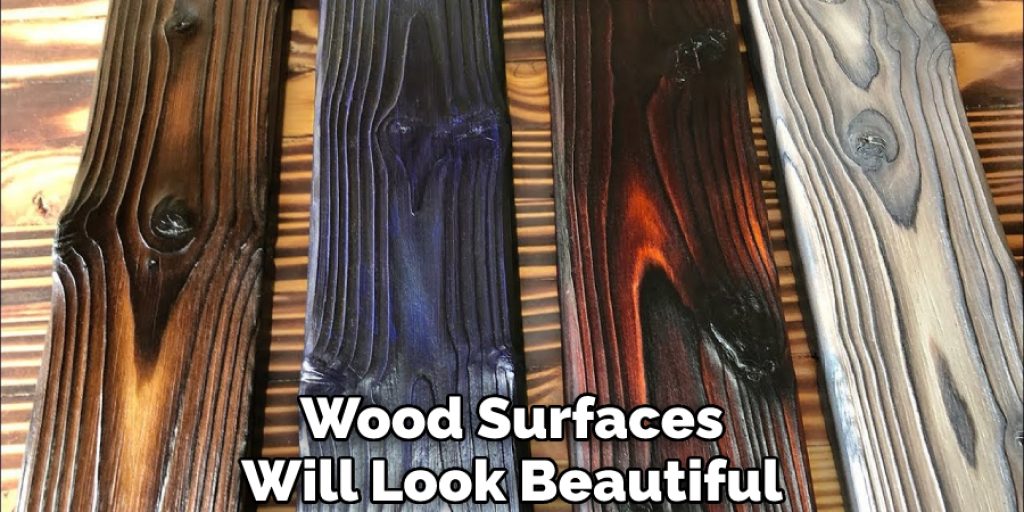
With a little care and attention, your wood surfaces will look beautiful for years. Keep reading for more information about how to seal burnt wood.
The Do’s and Don’ts of Sealing Burnt Wood
One of the most important steps in refinishing burnt wood is properly sealing it. This will not only protect the wood from further damage but also help restore its natural beauty. While several different sealants are available on the market, it is important to choose one specifically designed for burnt wood. Applying a sealant is a relatively simple process, but there are a few things to remember. First, make sure that the wood is completely dry before proceeding.
The sealant will not adhere properly if the wood is even slightly damp. Second, apply the sealant in thin coats, allowing each coat to dry fully before adding another. Finally, avoid using too much sealant, giving the wood a gummy appearance. By following these simple tips, you can easily refinish burnt wood and give it a new lease on life.
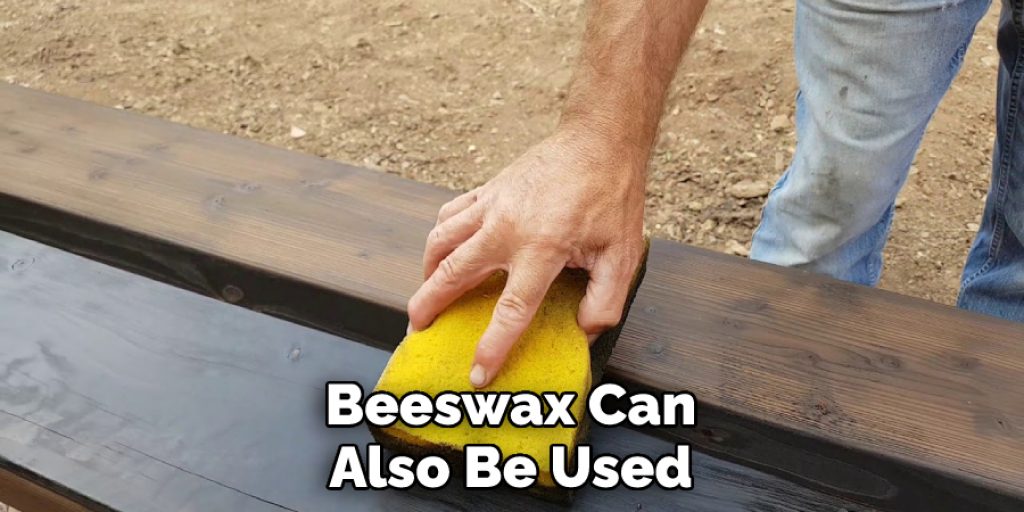
What Sealant Should You Use for Sealing Burnt Wood?
When it comes to sealing burnt wood, there are a few different options to choose from. One popular choice is polyurethane, which can be applied with a brush or sprayer. Polyurethane creates a durable, waterproof barrier that helps to protect against future damage. Another option is shellac, which is made from resin secreted by the lac bug. Shellac dries quickly and provides a smooth, glossy finish.
It is also relatively easy to apply, making it a good choice for those who are not experienced in sealing the wood. Finally, beeswax can also be used to seal burnt wood. Beeswax creates a protective layer that helps to prevent moisture damage and fading. It can be applied using a cloth or brush, and it can also be buffed to create a shiny finish.
How to Seal and Protect Charred Wood
One of the best ways to protect charred wood is to seal it with a high-quality sealant. This will help to create a barrier against moisture and other elements that can cause damage. A good sealant will also provide UV protection, helping to keep the wood looking like new for longer. When applying the sealant, be sure to follow the manufacturer’s instructions carefully.
You will most likely need to apply multiple coats to achieve the best results. Once the sealant has been applied, you should allow it to dry completely before using the wood. With proper care, your charred wood will be protected for many years to come.
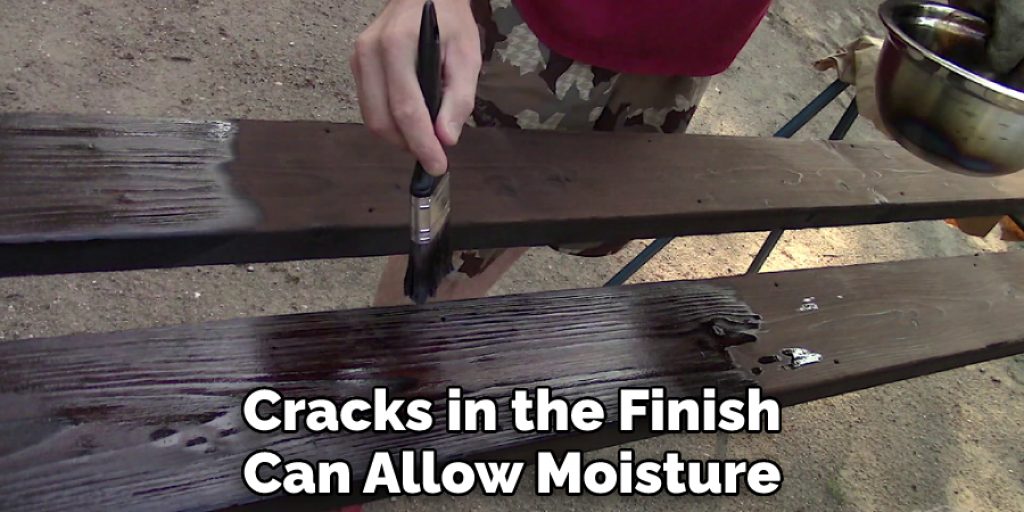
What Are the Signs that You Need to Seal Burnt Wood?
One of the most important things you can do to protect your wood-burning investment is to seal the wood regularly. But how do you know when it’s time to re-seal? Here are a few signs that indicate it’s time to break out the sealant:
The wood is starting to look dull: If your wood-burning stove or fireplace insert starts to look faded or dull, it’s probably time for a new coat of sealant. The sealant protects the wood from UV rays and other environmental factors that can cause fading.
There are cracks in the finish: Cracks in the finish can allow moisture to get into the wood, leading to warping, cracking, and other damage. If you see any cracks, it’s time to reseal.
The wood is showing signs of wear and tear: Over time, even the best-sealed wood will start to show some wear and tear. If you see scratches, chips, or other damage, it’s time to apply a new coat of sealant.
Sealing your wood-burning stove or fireplace insert will help it last longer and look better. Ask a professional for advice if you’re unsure how often to seal.
Conclusion
Sealing burnt wood can be tricky, but it is possible with the right steps. Be sure to remove any charred wood, apply a sealant, and then follow up with a top coat of paint or varnish. With these steps, you’ll have no problem giving your burnt wood a smooth, finished look. Thanks for reading our post about how to seal burnt wood.