
How to Shower With a Broken Foot
If you have a broken foot and need to shower, there are some things you can do to make the process easier. In this blog post, we will be discussing how to shower with a broken foot. First of all, try not to stand up if possible or use your injured foot for any reason. Instead, you may want to sit on a bench in the shower so that it is easier for you to get in and out.
It will also be helpful if someone else helps you wash your hair because it may be difficult with only one hand available. Make sure that your shampoo bottle is easy to reach from where you’re sitting so that you don’t have difficulty washing your hair without using both hands. And finally, once finished with the showering process, try not to put any weight on the injured foot when getting out of the bathroom. Read o to know more.
Things to Consider Before Showering With a Broken Foot:
It would help if you considered some things that we have discussed before you know how to shower with a broken foot.
1. Going to the bathroom is enough exposure to the injured foot that you should wait until it’s fully healed before taking another shower. If you can’t shower without exposing your broken foot, don’t take one!
2. If exposure is unavoidable (e.g., bathing children), then use a “toe-spacer” between toes to prevent damage/infection.
3. Shower as quickly as possible! Even if the bandage is waterproof, avoid getting it wet to keep from prolonging your exposure.
4. Keep a hand towel handy to wipe down the shower floor before climbing in and out of the tub/shower, so you don’t slip and fall.
5. Use a non-skid bath mat or a stool to sit on while showering, if necessary.
6. In the event of falling in the shower with a broken foot, use your arms and legs to brace yourself from falling too hard against the tub/shower floor instead of grabbing onto nearby objects.
7. See a doctor if the pain becomes unbearable before the break is completely healed. You don’t want to lose range of motion because you’re stubborn.
8. Use your non-broken foot to prop yourself up while getting in and out of the shower/tub. Then use the faucet for balance when washing up.
10 Ways on How to Shower With a Broken Foot:
Here we have mentioned some ways on how to shower with a broken foot. Be sure to follow this guideline.
1. Use a Waterproof Cast Protector:
A waterproof cast protector is a Cast Protector that allows showering while keeping the cast or bandage dry. These are available in many local pharmacies and can be found online also. You will need to buy a size, which fits your leg/ankle circumference when it is not swollen. When you purchase one of these, make sure it is big enough to go over your cast or bandage.
2. Soak First:
Fill a plastic container with warm water and place your cast/brace in, immersing it completely. You can now use this as a foot bath or have the immersion for a few minutes before stepping into the shower. Make sure to dry thoroughly afterward if using as a foot bath. If you are soaking in the shower, make sure you do not slip on the wet bottom. Dry thoroughly afterward if using as a foot bath. If you are soaking in the shower, make sure you do not slip on the wet bottom.

3. Use an Aloe Vera Gel or Lotion:
Using an aloe vera gel or lotion on your cast will keep it from drying out and feeling ashy. You can apply a generous amount to the entire form before putting your shower cap on.
4. Wash with a Mask On:
After thoroughly wetting the hair and body, put a shampoo/conditioner mask on your cast/brace before washing yourself. It is ok to scrub while the mask has been set. Rinse thoroughly, and dry your hair with a towel before getting out of the water. Since you are “masking” your cast/brace, this may make having to take it off easier. A nice soak in the tub. We know that you miss this, so take advantage of it while you can. You can add some aromatherapy to the water to relax even more.
5. Cover the Area with Plastic:
Put a plastic bag around the area where your cast or bandage is. The goal here is to seal the water in so that it doesn’t trickle under to cause swelling and infection. Simply placing a plastic bag over the cast/brace alone may not be effective since the water will seep through slightly, leading to minor swelling. Use a waterproof adhesive bandage or another type of sealant over the plastic bag. The adhesive will further solidify the barrier and make it more effective.
6. Dry Slowly:
To remove your cast or brace, first wet it with a towel. Rub the wet areas slowly and make sure to dry them thoroughly. If you need help removing the wet towel or plastic bag, ask someone for help. Do not twist your cast or brace while removing it from the water, and do not let any of the wet areas touch other parts of your model.
7. Have Someone Help You:
Ask someone near you to help you dry off, get dressed, and apply any lotions or ointments. It will be much easier if you have someone help you with all these things, and this will reduce the risk of getting your cast/brace wet again before it has a chance to dry.
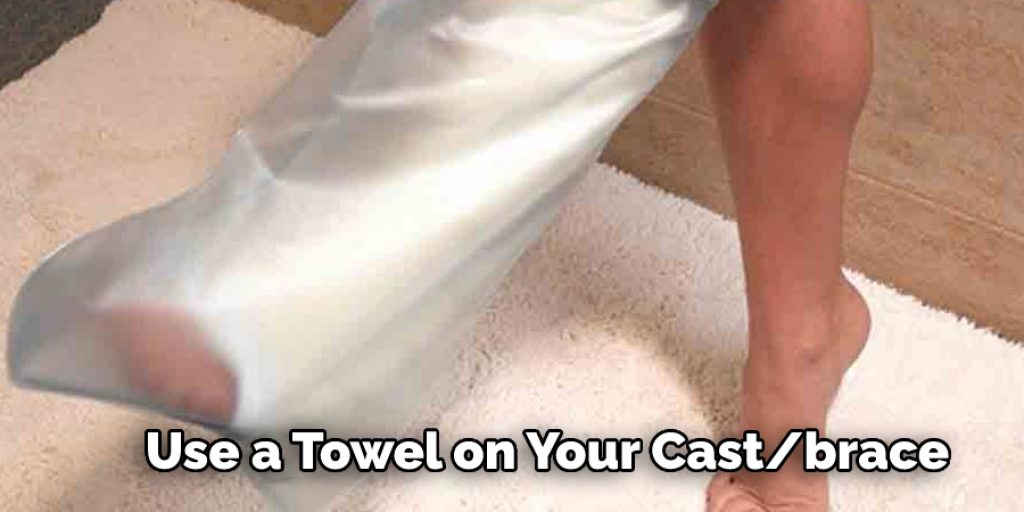
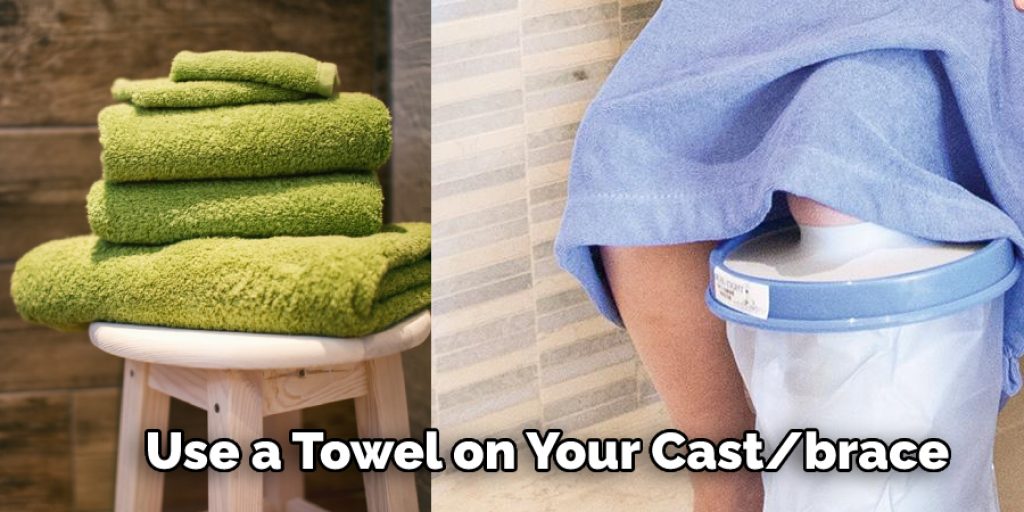
8. Dry the Area Thoroughly:
After getting out of the shower, thoroughly dry your skin and hair. You can use a towel on your cast/brace; however, drying over it may cause excess moisture to stay where it shouldn’t. Once you have dried, apply aloe vera gel to the cast/brace and allow it to dry.
9. Use a Cast Cover:
A cast cover is an easy way for one-handed showering since your movements are unrestricted without worrying about keeping a bag on in the water or holding up a plastic bag while in the shower. Slip-on the cast cover and go!
You should be able to shower as you usually would but keep in mind that your movements may be limited due to the cast/brace. Also, if water gets under it, your skin may begin to itch and swell slightly, so make sure to pay attention and scratch where necessary. How should I sleep? Some people may feel comfortable sleeping on their back or side with the knee propped up but don’t try to force your leg into any positions.
10. Dry Your Hair With a Diffuser:
Running your hair under the faucet to wet it may cause excess moisture in your cast/brace, leading to itching and swelling. Instead, put your hair up in a bun when you shower so that it doesn’t get wet, or use a dryer with a diffuser attachment. You can also purchase a cast cover (mentioned above) to slip over your head to dry your hair.v
Some Tips and Tricks:
1. Use a garbage bag as a makeshift boot.
2. Empty the shampoo bottle and fill it with water. This will make for a sprayer.
3. Fill up a jug or other container to pour over your body. You can also splash yourself down if you want, but be careful! If the injury is to the foot/ankle area, you want to avoid slipping.
4. Sit on a shower chair and put your injured foot/leg over the edge of the seat so that it’s elevated
5. Grab a bottle with a handle and use it as a shower scrubber! You can buy those with handles from dollar stores if needed or use a washcloth.
6. Wash your hair the way you usually would, or get someone else to do it for you!
7. Use a bath brush if necessary. If the injury is around the hip area, this may be difficult without hurting yourself further, so stick with using your hands/feet for this part.
Precautions and Safety Measures:
1. Use a shower chair in which you must sit to take your shower. A bath bench can also work but is not as sturdy or reliable since water can leak into the tub. If using a bath bench, place towels over the side arms to avoid getting any water on them and possibly rusting them out prematurely.
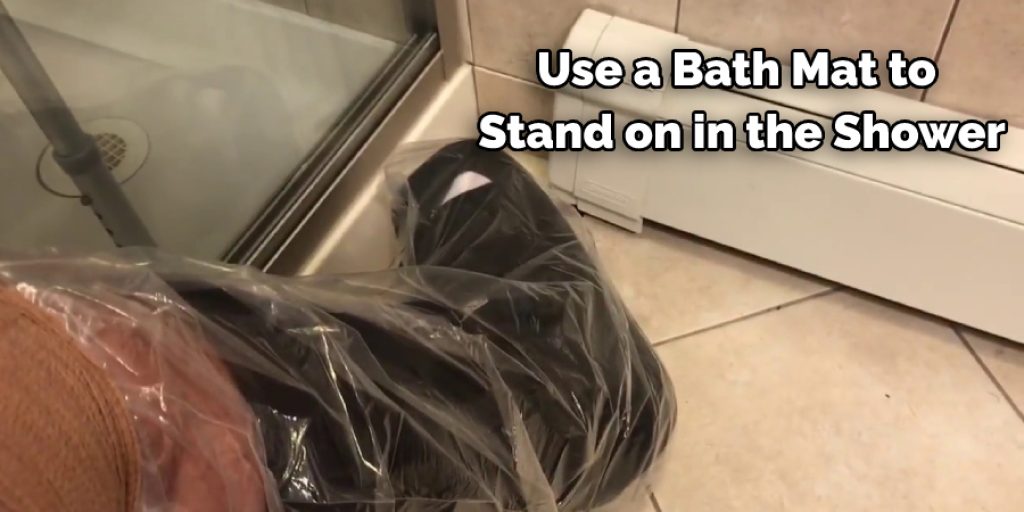
2. Use a bath mat to stand on in the shower. This can be achieved with either a standard or non-skid bath mat. It is wise to have more than one if an accident occurs and you slip; you don’t want to fall very far!
3. Use a mirror to shave, comb/brush your hair, etc., to avoid having to bend over, which may cause you to slip.
4. If your shower head is adjustable, take it off the wall and bring it over to where you are sitting, so you don’t have to reach up while trying not to fall! If your shower head has any other features (water settings, detachable handheld unit), take them off the wall and bring them into the shower with you.
5. If your shower head is detachable, secure it in a zip-lock bag, then put another zip-lock bag over it (the second one can be larger than the first, like a sandwich bag) before securing the whole thing with a rubber band. This ensures that no water seeps through the cracks and hits you, which can be very painful on a broken foot since it is still healing.
It’s essential to keep some things in mind when showering with a broken foot. First off, you’ll need someone else to help get your clothes off and into the laundry hamper. Just because you have one good leg doesn’t mean that both of them are functional! Second, once they’re out of harm’s way, make sure not to stand underwater or let cold air touch the injured area for too long.
Conclusion:
A broken foot can be a painful and frustrating injury. A broken foot is one of the most common reasons for an individual to take time off work or school, causing hardship on their family life and themselves. Thankfully there are ways you can still shower with a broken foot without too much difficulty.
The best way is by using bath products that will not require any bending from your ankle down through your toes. This includes shampoo, conditioner, soap, body wash, and lotion, all of which should come in liquid form or as bar soap, so they’re easy enough to handle. We hope this blog post on how to shower with a broken foot has been helpful. If you have any questions or want to know more, then feel free to comment below!
Angela Ervin
Angela is the executive editor of DIY quickly. She began her career as an interior designer before applying her strategic and creative passion to lifestyle and home. She has close to 15 years of experience in creative writing and online content strategy for housekeeping, home decorations as well as other niche efforts. She loves her job and has the privilege of working with an extraordinary team. She lives with her husband, two sons, and daughter in Petersburg. When she's not busy working she spent time with her family.


