
How to Take Apart a Delta Shower Head
Delta showerheads are the most popular type of showerheads in America. They have a consistent flow rate, are easy to maintain, and are relatively inexpensive compared to other models.
So if you’re looking for how to take apart a delta shower head, then this blog post will be helpful for you!
If you’re looking for this type of model but don’t want to pay an arm and a leg, Delta offers a moderately priced line but still maintains all the benefits of more expensive brands.
There are many ways you can do this, but installing a new showerhead is one simple and effective way. Delta has been producing top-quality shower heads for over 100 years now. In that time, they have developed an innovative technology that makes their products both easy to use and long-lasting.
10 Reasons Why You Need to Take Apart a Delta Shower Head
Before you know how to take apart a delta shower head, check these reasons why you need to take apart a delta shower head.
1. To Check for Dirt and Debris:
Since the Delta shower head has many holes, there is a chance that it could get plugged up. When this happens, your water pressure will slowly diminish, or you may not get any water at all when the shower is on.
Taking apart the Delta shower head will allow you to check for dirt and debris in each hole (especially the one that delivers water to the showerhead).
2. To Clean It:
When you take apart your Delta shower head, you will easily clean each hole. This will improve the performance of your shower by making it easier for water to flow through. In addition, if you notice dirt or debris in your Delta shower head, this cleaning can help eliminate it.
3. To Adjust It:
If you notice the water pressure is diminished, you might want to play around with your Delta shower head settings. Since they are adjustable, there could be something that you aren’t pushing all the way down or maybe not pushing it down enough, which is limiting your water flow.
You might want to try playing around with the settings on the shower head until you can get your desired pressure back.
4. To Clean Up Water Spots:
After you have taken apart your Delta shower head, there is a chance that it will be dripping water due to being taken apart. This means you will have water spots all over your bathroom sink, which can be seen as unsightly and unhygienic.
You might want to take a cloth or towel and wipe down the surfaces until they are dry after taking apart the showerhead.
5. For Removing Water Restrictors:
The Delta shower head has a water restrictor inside of it. This is meant to limit the amount of water that comes through at one time, which can come in handy if you have small children afraid of the intense water flow through the showerhead.
However, if you want a more robust water flow or your children are old enough, you must remove this water restriction.
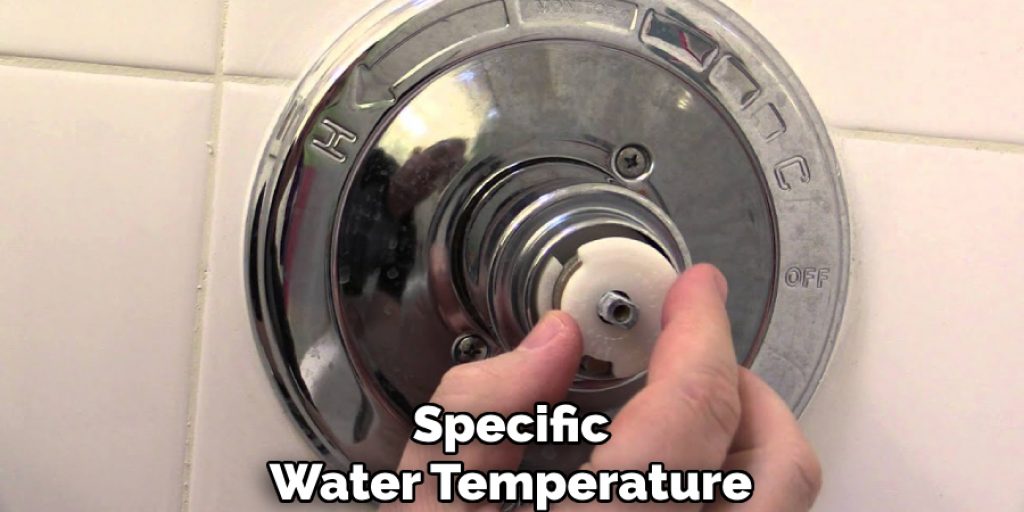
6. To Change the Temperature:
The Delta shower head has an adjustable temperature dial. This can be useful if you are trying to get a specific water temperature but find that it takes too long for the water to warm up. If this is bothering you, you might want to play with the settings on the shower head until you can get the temperature you want.
7. To Check the Water Filter:
The Delta shower head has an option where you can turn on the water filter. This is meant to help remove contaminants from your water supply, which might be beneficial if you live somewhere where the water smells or tastes odd.
If this interests you, take apart your Delta showerhead and check to see if it needs cleaning or replacement.
8. To Prevent Overuse:
The Delta shower head has a water control feature that allows you to limit the amount of time spent in the shower. This is meant to prevent overuse, which can become problematic if you use up all of your hot water before the day is done. Setting this for yourself can help save you money and the environment by preventing the overuse of water.
9. To Fix It:
If your Delta shower head is working fine but has a leak, you might need to tighten a few things. First, you can easily take apart the showerhead and use a wrench to tighten the bolts that connect it with the pipe. This will help prevent leaks from occurring.
10. To Prevent Rust:
The Delta shower head has a stainless steel exterior, which is more resistant to rust than traditional fixtures. However, if you want your Delta shower head to remain shiny and new for as long as possible, you might want to take apart the shower head and clean it from time to time.
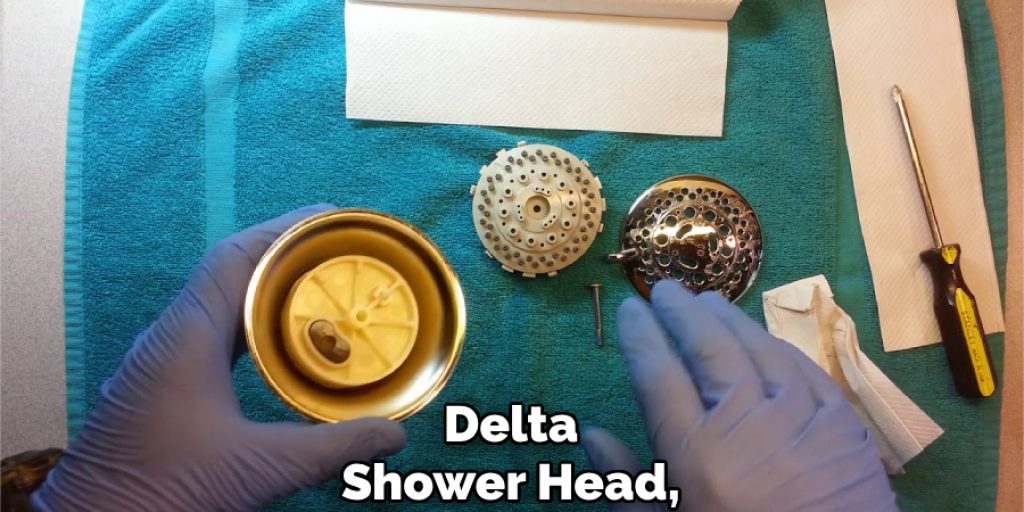
Step by Step Guide: How to Take Apart a Delta Shower Head
We have given step-by-step instructions on how to take apart a delta shower head. Be sure to follow these guidelines:
Step 1: Prepare Your Workspace
Make sure your workspace is well-lit and flat. This will allow you to focus on the task at hand without straining yourself or damaging anything. Delta shower head removal can be tricky if it’s not done correctly, so make sure you have enough room to work before you begin.
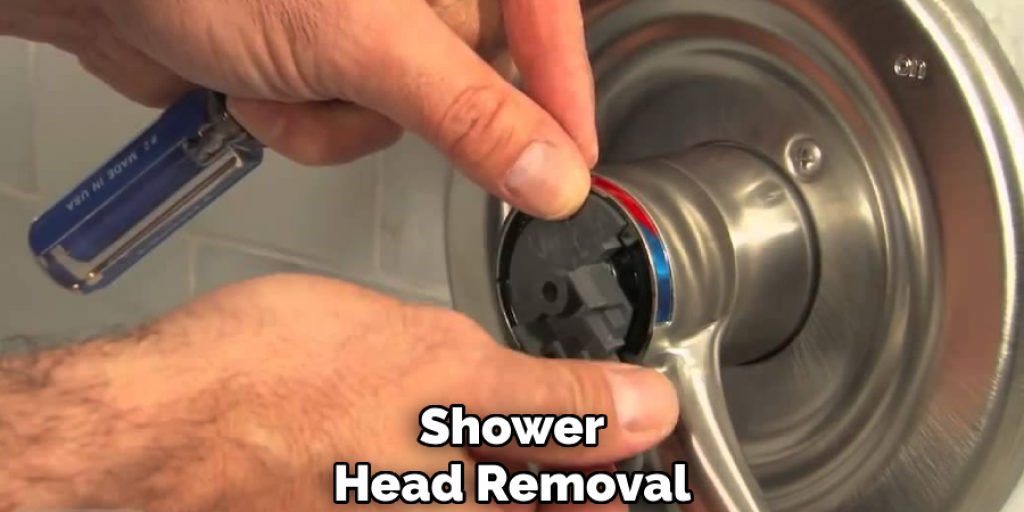
Step 2: Remove Head from Fixture
To take apart a Delta shower head, you must remove it from the fixture. In many cases, this will require tools such as wrenches and screwdrivers to loosen fasteners and secure nuts. Make sure you have these on hand before beginning your project.
Step 3: Remove Material Covering
After removing the Delta shower head from the fixture, you will need to remove any material covering the interior of the assembly. Delta showerheads usually have some covering that can be cut, pried, or loosened using a screwdriver.
Step 4: Remove Screws Holding Delta Assembly Together
The next step in taking apart a Delta shower head is to remove any screws holding it together. These can be found on the exterior or interior of the device, so you will have to check carefully to avoid causing damage or injuring yourself.
Step 5: Break Apart Delta Assembly
Once all the screws holding a Delta shower head together have been removed, it should be relatively easy to break apart into its components. In some cases, this may require striking the assembly with a hammer or other heavy tool to separate it.
Step 6: Re-assemble Delta Shower Head
Put the showerhead back together by reversing your steps to take it apart. Sometimes, you may have to add more material or fasteners to keep everything secure and functioning correctly. Make sure you have these materials on hand before beginning the disassembly process.
That’s it! Once you’ve put the showerhead back together, it will be new and ready for use again.
Tips to Maintain Your Delta Shower Head:
1. To reduce calcium and lime buildup, rinse your shower head with vinegar after each use.
2. Turn on the water for a few seconds to flush out any debris that may have collected inside the showerhead.
3. With every use of your shower head, especially if you shampoo your hair or shave your legs, debris can build up in the spray holes. Regular flushing of your shower head will help to reduce this problem further.
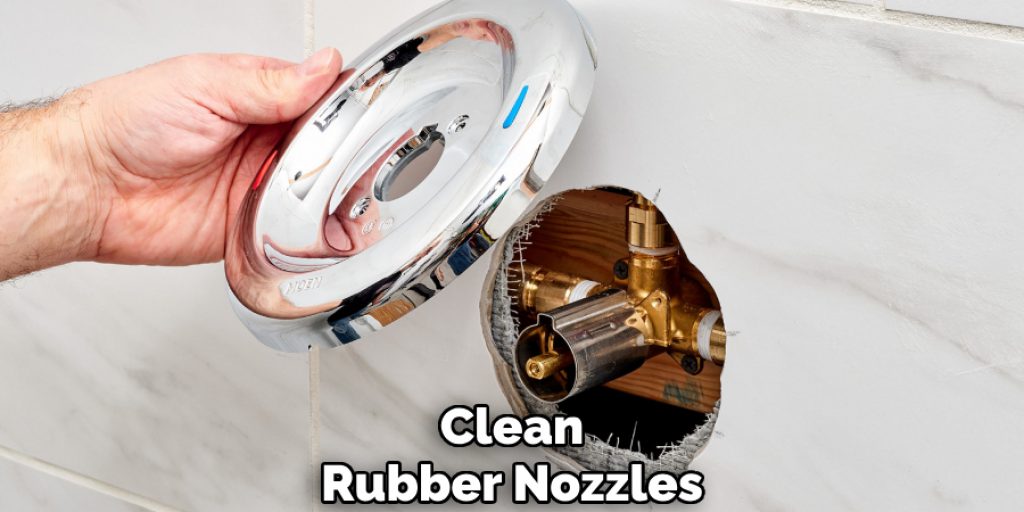
4. Periodically clean the rubber nozzles on your shower head with a small wire brush or toothbrush to remove any mineral deposits that may have formed over time.
5. You can use mineral deposits or lime-away if you desire to remove the calcium and lime buildup.
6. Every month, soak your shower head in a 50/50 mixture of vinegar and water overnight if mineral deposits are dense. If needed, use a small brush on any stubborn areas to help remove mineral deposits.
How to Prevent Rust Buildup in Delta Shower Head?
People who find themselves replacing their showerheads every few years may not realize that there are ways to prolong the life of your Delta Shower Head. It’s easy to prevent mineral buildup by using a dish soap and vinegar mixture, which can be rinsed off with lukewarm water.
Doing this once every couple of weeks will keep the buildup from building up. Also, be sure to dry the area where the shower head connects with your pipe every time you use it. This will prevent water spots and mineral buildup that can degrade your shower head’s appearance and function over time.
Conclusion:
The Delta Shower Head is a great way to upgrade your bathroom and save water. They are made to be durable, but they can still break if not handled with care. If you have a broken or damaged part on your Delta shower head, follow these instructions for how to take apart a delta shower head and replace the parts that need replacing.
If you want to remove the shower head, be sure not to discard any of its parts or pieces! You can reuse these when installing it in another shower if needed. Have any of these steps helped you? Leave us a comment below!
Angela Ervin
Angela is the executive editor of DIY quickly. She began her career as an interior designer before applying her strategic and creative passion to lifestyle and home. She has close to 15 years of experience in creative writing and online content strategy for housekeeping, home decorations as well as other niche efforts. She loves her job and has the privilege of working with an extraordinary team. She lives with her husband, two sons, and daughter in Petersburg. When she's not busy working she spent time with her family.


