How to Tone Down Orange Wood Floors
Do you have orange-toned hardwood floors that seem to dominate your living space? Here’s some good news: toning down the look of your floor doesn’t require a full renovation or hours spent sanding and staining! With the right know-how, materials, and creativity, you can dramatically enhance and even change the hue of your wood floors in no time.
In this blog post, we’ll share our top tips for how to tone down orange wood floors without ripping them out completely—follow along as we reveal easy solutions so that you can begin breathing new life into your home today!
What is an Orange Wood Floor?
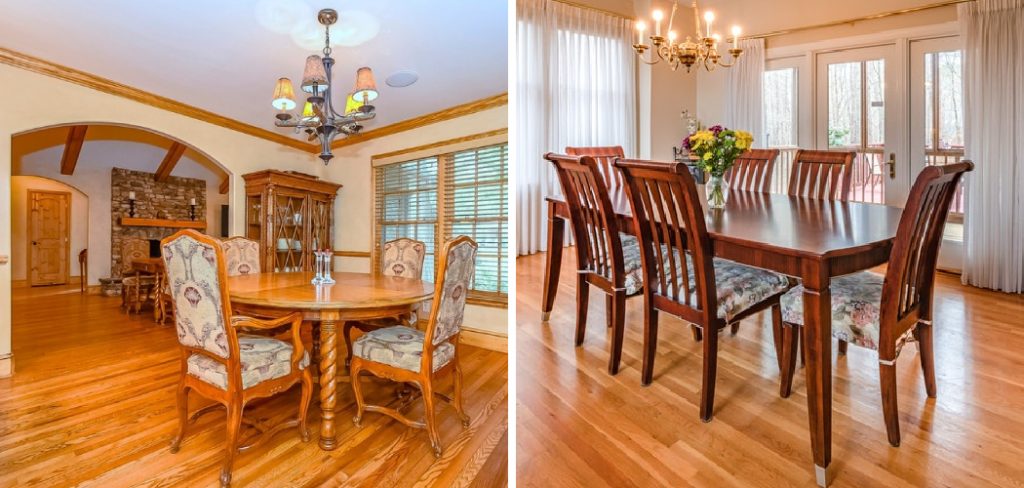
Before we get into the details of toning down orange wood floors, it’s crucial to understand what causes this hue in the first place. Orangewood floors are typically created by using a stain that has a heavy red undertone, such as maple or cherry finishes. Over time, these stains can become more orange-toned due to exposure to sunlight and air. It can also be a result of the natural aging process of the wood.
Necessary Materials
Below is a list of materials you need to get started:
- Paint or Wood Stain in a Color That Will Help Balance Out the Orange Tone.
- Sandpaper (Medium Grit).
- Protective Gear Such as Gloves, Goggles, and Mask.
- A Clean Cloth.
- Polyurethane or Other Protective Coat.
- Paintbrushes and Rollers.
- Paint Tray.
Now that you have your materials ready, let’s dive into the steps!
10 Step-by-step Instructions on How to Tone Down Orange Wood Floors
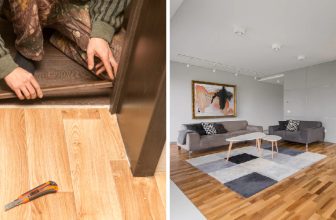
Step 1: Clean and Sand the Floors
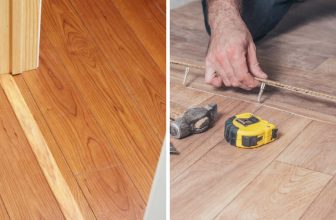
The first step in toning down orangewood floors is to prepare the surface. Start by giving your floor a thorough clean and floor sanding session. This will remove any dirt, grime, or built-up layers of finish that may have accumulated on the surface over time. It’s best to use a medium-grit sandpaper for this step to avoid damaging the wood. But remember to always wear protective gear while sanding!

Step 2: Prepare Your Stain or Paint
After your floor has been cleaned, it’s time to mix up your stain or paint. Use a color that will help balance out the orange tone, such as a cool grey or light brown. Test the color on an inconspicuous area of your floor to ensure it’s to your liking before proceeding. You can also mix different shades to achieve the perfect tone. It’s always a good idea to have some extra stain or paint on hand in case you need to do touch-ups later.
Step 3: Apply Stain or Paint
Using a paintbrush or roller, apply the stain or paint in sections on your floor, working in the direction of the wood grain. Be sure to overlap each section slightly to ensure smooth and even coverage. It’s also essential to work in small sections and blend the edges as you go to avoid any obvious lines or patches. You may need to apply multiple coats for a more dramatic change in color.
Step 4: Wipe Off Excess Stain or Paint
After you have applied the stain or paint, use a clean cloth to wipe off any excess. This will help prevent drips or puddles from appearing on your finished floor. This step is especially crucial if you are using a darker color, as it can be more challenging to remove excess stain or paint once it has dried.
Step 5: Let Dry
Allow the stain or paint to dry completely before proceeding with the next steps. This can take anywhere from a few hours to overnight, depending on the type of stain or paint you’re using. It’s essential to follow the manufacturer’s instructions for drying time. But make sure the floor is completely dry before moving on to the next steps. You can use a fan or open windows to help speed up the drying process.
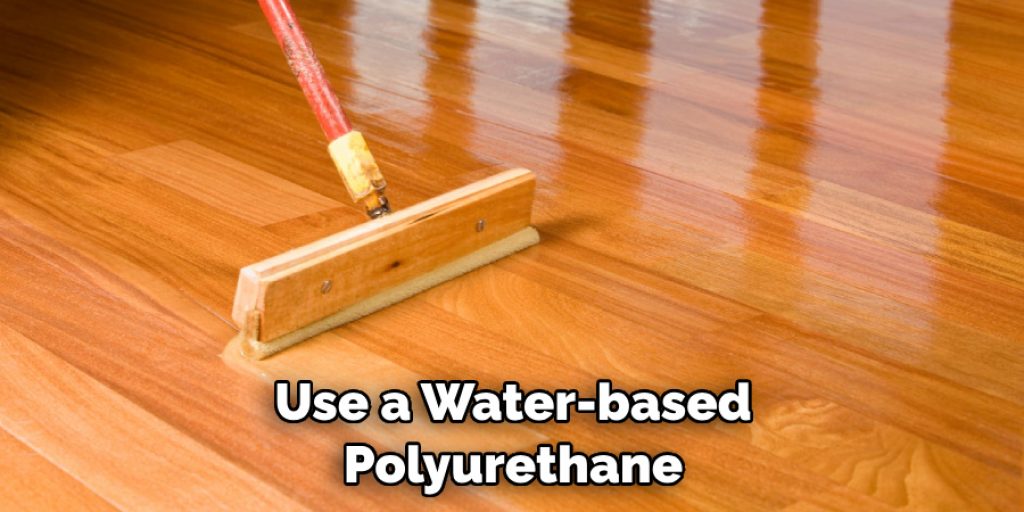
Step 6: Apply Protective Coat
Once your stain or paint has dried, it’s time to apply a protective coat such as polyurethane. This will help seal in the color and provide a durable finish for your floors. It’s best to use a water-based polyurethane as it dries faster and has a lower odor compared to oil-based options. Apply the protective coat in thin, even layers and let dry completely between coats.
Step 7: Lightly Sand Between Coats
After the first coat of protective finish has dried, lightly sand the surface with fine-grit sandpaper to smooth out any imperfections. Wipe off the dust with a clean cloth before applying a second coat of protective finish. You can repeat this step for a third coat if desired. But remember, the more coats you apply, the longer it will take for them to dry.
Step 8: Repeat if Necessary
If the color is still too orange for your liking, you can repeat steps 3-7 until you achieve your desired hue. Just be sure to let each coat of stain or paint dry completely before applying the next one. It may take some trial and error, but with patience and persistence, you’ll get the perfect color for your floors. However, keep in mind that the color of your floor may change slightly as it continues to dry and cure.
Step 9: Add Rugs and Furniture
To further tone down the orange wood floors, consider adding rugs or furniture in complementary colors. This will help balance out the color and add visual interest to your space. You can also incorporate other decor elements like curtains, throw pillows, and artwork to tie the room together. It’s amazing how much difference a few accent pieces can make!
Step 10: Maintain Your Floors
To keep your newly toned-down wood floors looking their best, be sure to regularly clean and maintain them. Use a soft vacuum attachment or broom to remove any dirt and debris, and avoid using harsh chemicals or abrasive materials that can damage the finish. You can also periodically reapply a fresh coat of protective finish to keep your floors looking like new. But remember, regular maintenance is key to preserving the color and quality of your floors.
And there you have it – 10 simple steps on how to tone down orange wood floors. With a little time and effort, you can transform your floors from bright and bold to warm and inviting. So grab your materials and get ready to give your floors a makeover! Happy renovating!

Additional Tips and Tricks
- If You’re Not Confident in Your Diy Skills, Consider Hiring a Professional to Help With the Process.
- Experiment With Different Stains or Paint Colors on Small Areas of Your Floor Before Committing to the Entire Space.
- Invest in Quality Materials for Longer-lasting Results.
Frequently Asked Questions
Q1. How Long Does It Take to Tone Down Orange Wood Floors?
A1. The time it takes will vary depending on the size of your space and the type of stain or paint used, but typically it can be completed within a day or two. It’s essential to factor in drying time for the stain or paint and protective finish.
Q2. Can I Use Any Type of Stain or Paint on My Wood Floors?
A2. It’s best to use a stain or paint specifically designed for wood floors to ensure the best results and durability. However, you can also use regular interior paint in a satin or semi-gloss finish if you prefer.
Q3. Will Toning Down Orange Wood Floors Completely Change the Color?
A3. Toning down orange wood floors will not entirely change the color, but it will help balance out and neutralize the orange tones. The final result will depend on the original color of your floors and the type of stain or paint used.
Q4. Can I Skip Applying a Protective Coat?
A4. It’s highly recommended to apply a protective coat to seal in the color and provide durability for your floors. Skipping this step may result in chipping, fading, or staining on your newly toned-down floors.

Conclusion
With all the options available, achieving a more balanced and muted color of orange for your wood floors is possible. Whether you opt for whitewashing or painting, these methods offer an easy alternative to simply living with overly orangy wood floors. After completing one or many of the projects mentioned in this blog post, your interior decorator side will thank you as it adds charm and comfort to any living space.
Of course, if none of these tips on how to tone down orange wood floors fit your style and budget then you could consider using furniture accessories like area rugs, curtains, cushions, throws etc. to tone down those orange wood floors. So don’t be discouraged by louder orange tones in your home – find a way to make them work!
Time spent researching ideas for tweaking the appearance of the space is time well spent as it adds a unique character to the home and makes for happy memories of relaxation and fun with friends and family. Now that you know how to tone down those orange wood floors why not start today?
Angela Ervin
Angela is the executive editor of DIY quickly. She began her career as an interior designer before applying her strategic and creative passion to lifestyle and home. She has close to 15 years of experience in creative writing and online content strategy for housekeeping, home decorations as well as other niche efforts. She loves her job and has the privilege of working with an extraordinary team. She lives with her husband, two sons, and daughter in Petersburg. When she's not busy working she spent time with her family.