
How to Use Tattoo Transfer Paper Without Machine

A tattoo transfer paper is a special type of paper that can create temporary tattoos for you and your friends. It allows you to do so in various media, including pencil, marker, and ink. It’s also perfect for those looking for more creative options regarding their tattoos. In addition, tattoo transfer paper is an easy way to get rid of your old tattoo without going through the pain and expense of laser removal.
Many different types, sizes, and colors of tattoo transfer papers are available on the market today. This blog post will provide helpful tips on using tattoo transfer paper without machine so you can enjoy creating these fun designs with your children or friends!
What is Tattoo Transfer Paper?
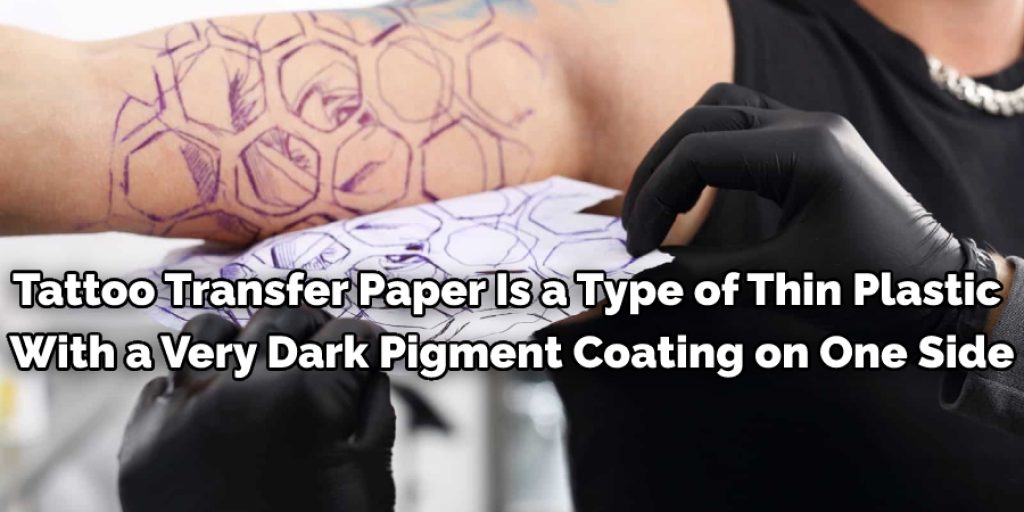
Tattoo transfer paper is a type of thin plastic that helps artists apply tattoo designs to people’s skin. The paper has a dark pigment coating on one side, which helps the design transfer from the artist’s work table to the person’s skin evenly.
The pigment on the paper doesn’t transfer to your skin, so you can use it easily with bare hands; no gloves are needed! However, we still recommend using a piece of cloth or some paper towel while handling this stuff just for safety’s sake.
8 Ways on How to Use Tattoo Transfer Paper Without Machine
Tattoo transfer paper is sheets of plastic with an adhesive coating on one side. They are used in the tattoo industry to transfer a design or pattern from a small sheet or book to the skin to perform the ink work. You can use transfer paper in several ways without having a tattoo machine at all. Here are ten alternative methods for using this technique.
1. Temporary Tattoo Art:
You can use transfer paper to create temporary tattoos that look similar to henna tattoos. Just print a design on the plastic side of a sheet of transfer paper and cut it out in a sticker shape. Then, apply a thin layer of glue all over your skin or on top of a stencil,
apply the transfer paper sticker to your skin, cover it with a piece of paper or plastic baggie and press down firmly. Wait several minutes until the glue dries completely; before you peel off the transfer, remove both pieces at once. The design will remain behind on your skin.
2. Waterproof Stencils:
You can use transfer paper to create a temporary stencil on the skin. Apply glue all over your skin where you want to place the tattoo, place the transfer paper sticker on top of that, cover it with a piece of paper or plastic baggie and press down firmly. Wait several minutes until the glue dries completely; before you peel off the transfer, remove both pieces at once. The design will remain behind on your skin.
3. Stencil for Airbrush:
You can use transfer paper to create temporary stencils for airbrush tattoos. Print a pattern on the plastic side of a sheet of transfer paper and cut it out in a sticker shape. Then, apply glue all over your skin where you want to place the tattoo,
place the transfer paper sticker on top of that, cover it with a piece of paper or plastic baggie and press down firmly. Wait several minutes until the glue dries completely; before you peel off the transfer, remove both pieces at once. The design will remain behind on your skin.
4. Glitter Stencils:
You can use transfer paper to create temporary glitter tattoos. Just replace the permanent marker with glitter. Then, apply glue all over your skin where you want to place the tattoo, cover it with powdered glitter,
cover it with a piece of paper or plastic baggie and press down firmly. Wait several minutes until the glue dries completely; before you peel off the transfer, remove both pieces at once. The design will remain behind on your skin, but it will also now be covered in glitter!
5. Temporary Tattoo Stencils:
You can use transfer paper to create temporary tattoo stencils. This is done similarly to how an ordinary tattoo transfer is made. Take a tissue and place it over the area you want to apply the tattoo stencil, then press down on one end of the transfer paper with a pencil or pen.
Next, apply glue all over your skin where you want to place the tattoo; place the transfer paper sticker on top of that. Wait several minutes until the glue dries completely; before you peel off the transfer, remove both pieces at once. The design will remain behind on your skin to provide a guide for performing the ink work.
6. Easily Changeable Striped Designs:
You can use transfer paper to create temporary tattoos that include easily changeable striped designs. This is done by drawing vertical stripes on the transfer paper using a ruler, then printing them onto your skin. For this design, you can use almost any type of marker or paint that will not wash away in water but that does come off with baby oil.
7. Tattoo Transfer Designs onto Fabric:
You can use transfer paper to create temporary tattoos placed on fabric like paper dolls, for example. Cut a piece of fabric to the size you want, and mix up a small batch of cornstarch or baby powder in a bowl.
Apply this mixture with a brush all over the place where you want to place your temporary tattoo. Use another piece of tissue paper to cover what you have just powdered, then press down on the end of the transfer paper with a pencil or pen to create the tattoo.
8. Stencil for Nail Art:
You can use transfer paper to create temporary stencils for nail art. Just print a design or pattern on the plastic side of a sheet of transfer paper and cut it out in a sticker shape. Then, apply glue all over your fingernails (or toenails), place the transfer paper sticker on top of that, and press down firmly. Wait several minutes until the glue dries completely before you peel off the transfer and remove both pieces at once. Your nails will now be covered in a design!
7 Things To Consider When Using Tattoo Transfer Paper Without Machine:

1. The quality of the paper that you are using is essential. If you use cheap, low-quality paper, it won’t work well or last long at all. When choosing the brand of tattoo transfer paper to buy, go for either airflow or quickpro. They are high-quality transfer papers.
2. You’ll need to practice before you can master the technique. Measure how much tattoo transfer paper your particular design needs and cut the sheets to size.
3. Be careful not to touch or smudge the sticky side of the transfer paper with your fingers because it will prevent it from sticking properly to your skin.
4. You must remember that an outline is a little harder to transfer. If you’re going for an outline, then use at least five sheets of tattoo paper to be sure that it will stick to your skin well.
5. When placing the design face down on your skin, make sure that you line it up as perfectly as possible, or else you’ll have a hard time lining it up exactly when you go to transfer it.
6. You can use a thin, hard, and flat object like a ruler to outline your skin if you don’t have steady hands. Start at one end of the design and start pressing very lightly until you get to the other end of the design. If you press too hard, it might break the paper.
7. Make sure that you press hard enough on the tattoo transfer paper so that it will stick to your skin well but not too hard where it rips apart. After pressing down on the design, check if there are any bubbles in the design and remove them (a needle is recommended). Then, use a soft cloth to rub the back of the tattoo paper very carefully until it is pressed well into your skin.
You Can Check It Out to Build a Tattoo Machine Frame
Conclusion:
This informative blog post will help people learn how to use tattoo transfer paper without a machine. Many great artists have used this product for years because it provides a way of transferring designs to the skin without expensive machines or equipment and with minimal training.
The article goes on to give step-by-step instructions about how this process works, including water preparation, laying out the design, applying glue onto your hand or arm, pressing down firmly over the design area while keeping your fingers flat against your palm, then peeling off quickly after 10 seconds have passed. It also includes some tips like using a timer app on their phone if they have trouble timing themselves.
You May Also Read – How to Transfer Tattoo Stencil to Skin With Wax Paper
Elizabeth Davis
Elizabeth is a creative writer and digital editor based in the United States. She has a passion for the arts and crafts, which she developed from a young age. Elizabeth has always loved experimenting with new mediums and sharing her work with others. When she started blogging, she knew that DIYquickly would be the perfect platform to share her tutorials and tips. She's been writing for the blog from the beginning, and her readers love her helpful advice and easy-to-follow instructions. When she's not writing or editing, Elizabeth enjoys spending time with her family and friends.


