How to Wire a 4 Prong Toggle Switch
Wiring a 4-prong toggle switch can seem like an intimidating task, but it is actually quite straightforward. This type of switch has four prongs and is commonly used to control electrical devices such as lights, fans, and other appliances. It can be wired in either a single-pole or double-pole configuration depending on the circuit requirements. Wiring these switches requires some basic knowledge of electricity and some patience.
With the right materials and tools, you’ll be able to wire your toggle switch with ease! In this guide on how to wire a 4 prong toggle switch we will explain how to properly wire a 4-prong toggle switch by demonstrating how to connect each of its terminals correctly so that it functions correctly in any application you may need it for.
We’ll also provide tips on selecting the best gauge of wires for your project based on the amperage rating of your device(s). So let’s get started!
What is a 4 Prong Toggle Switch?
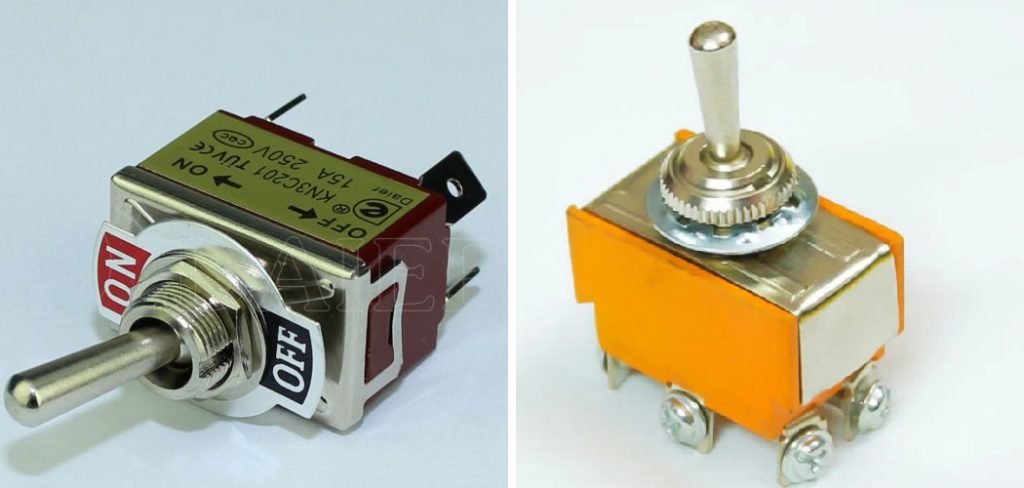
A 4-prong toggle switch is a type of electrical switch that has four terminals and can control two separate circuits. It consists of a flat lever arm with two interior prongs and two exterior prongs, which are used to connect the switch to a circuit. Each prong typically controls one side of the circuit, so flipping it back and forth will turn the device on or off.
The Advantages of Wiring 4 Prong Toggle Switch
1. Better Control
When wiring a 4-prong toggle switch, the main advantage of using this type of switch is that it can control two separate circuits. This means you can control multiple devices or appliances from one switch in an efficient and cost-effective way.
2. Easy Installation
Wiring a 4-prong toggle switch is relatively easy and straightforward. This makes it the perfect choice for DIYers who don’t have the expertise or access to professional wiring services. As this is a simple task, it can be completed in a matter of minutes with the right tools and materials.
3. Safer Operation
When using a 4 prong toggle switch, you have greater control over the current and voltage that the circuit is exposed to, which makes it safer overall. This means that you can wire devices correctly so that they are safe to operate in any environment.
Needed Materials and Tools
In order to wire a 4-prong toggle switch, you’ll need the following:
- A length of wire
- Wire cutters or strippers
- 4-prong toggle switch
- Electrical tape
•Screwdriver
10 Tips on How to Wire a 4 Prong Toggle Switch
1. Measurement
Cut the wire to your desired length. Measure and mark the spot where you will make your cut. If you measure correctly, you will be able to make a clean cut without any wires sticking out. While measuring, make sure the wire is long enough to reach the toggle switch as well as any other parts that need to be connected.
2. Stripping
Use wire cutters or strippers to strip away a short section of insulation around each end of the wire. Make sure not to strip too much insulation so that you don’t expose any of the wirings inside.
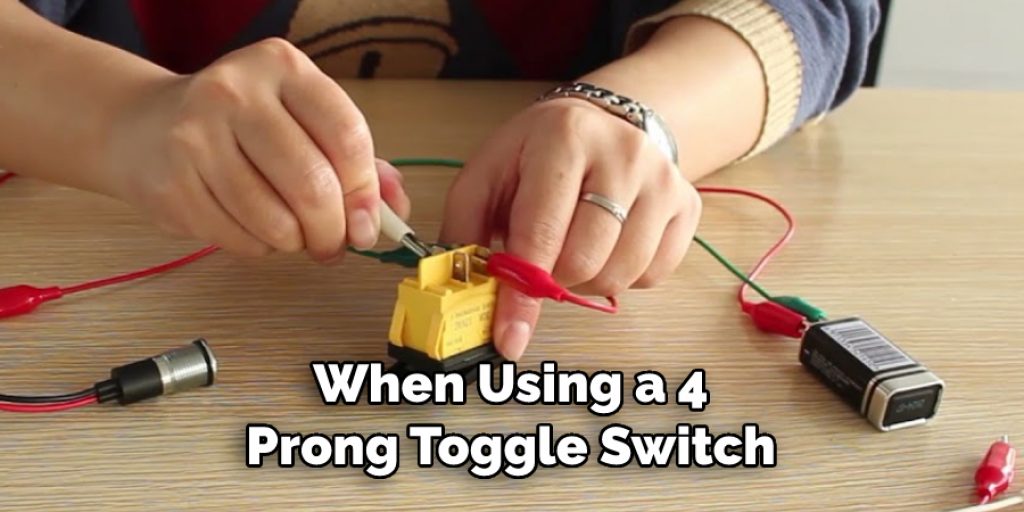
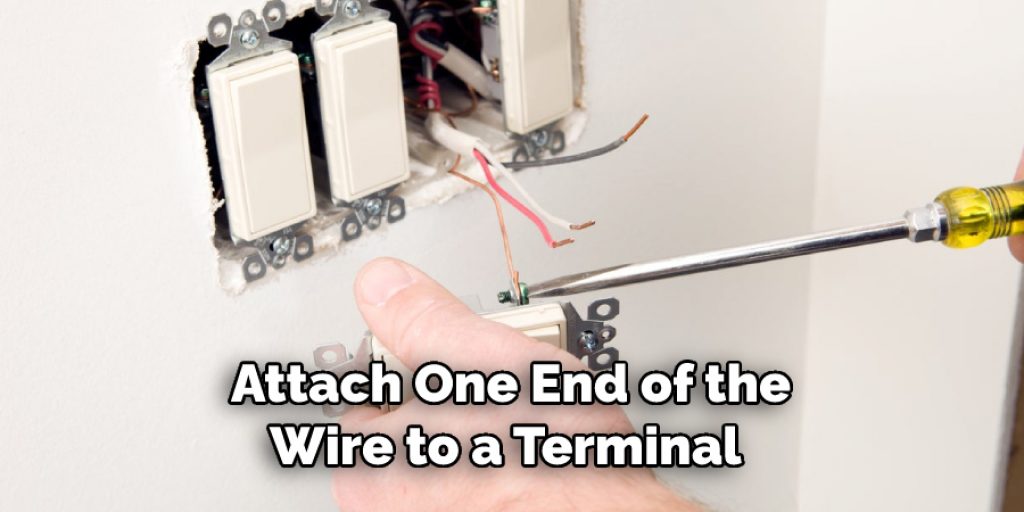
3. Attaching the Wire
Attach one end of the wire to a terminal on the toggle switch by wrapping it around and then tightening it down with a screwdriver. Make sure that both ends are securely attached so that they don’t become loose during operation.
4. Connecting to Devices
Connect the other end of the wire to any device or appliance that you want to control with the toggle switch. Make sure that all wires are securely connected and properly insulated before powering up your circuit.
5. Electrical Tape
Cover any exposed wiring with electrical tape to protect it from being damaged by moisture, heat, or other environmental factors. This will also ensure that there is no risk of electrical shock or short circuits.
6. Proper Gauge
Choose the right gauge of wire for your project based on the amperage rating of your device(s). If you choose an incorrect size, it can cause overheating and other safety issues. A proper gauge will help ensure that your device(s) operate safely and efficiently.
7. Tightening Screws
Make sure to tighten down all screws on your toggle switch, as loose connections can cause electrical problems. This is especially important if you are dealing with higher voltage applications. If you don’t have the proper tools, you may want to consider hiring a professional to do this job.
8. Precaution
Before turning on the power, double-check your wiring and ensure that all connections are secure. Inspect all wires for any signs of damage or wear and tear before powering up your project.
9. Testing
Turn on the power and test your wiring to make sure that everything is working correctly. If there are any issues, you should turn off the power immediately and investigate what went wrong.
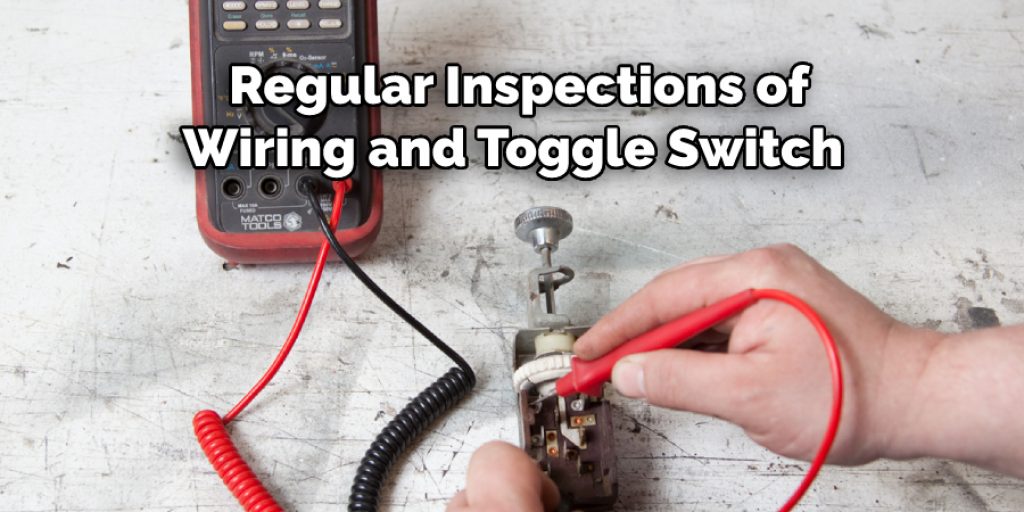
10. Maintenance
These are the basic steps on how to wire a 4 prong toggle switch. With just a few simple tools and materials, you can easily complete this task and get your device running safely and efficiently.
Perform regular inspections of your wiring and toggle switch to ensure that it is still functioning properly. Make sure to replace any parts or wires if they become damaged or worn out.
8 Safety Precautions to Follow
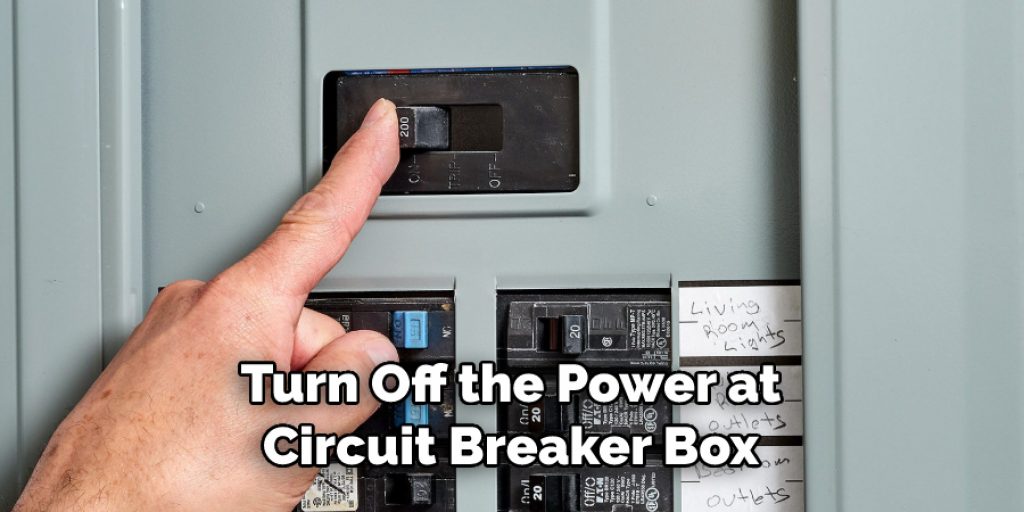
- Turn off the power at the main circuit breaker box before beginning any wiring. It is important to make sure that no one can turn the power back on while you are working with electricity.
- Test the switch with a multimeter before wiring it and ensure that it is rated for the amount of current required. The multimeter will also help you to check the terminals, making sure they are all working properly.
- Wear protective gear such as safety glasses, gloves, and long sleeves when wiring a 4 prong toggle switch. This will protect you from any electrical shocks or sparks that may occur during the process.
- Use insulated wires when connecting the toggle switch to the power source, and make sure that each wire is securely connected. Wires should be connected by twisting them around each other several times and then connecting them with a wire nut.
- Connect the ground wire to the toggle switch first, followed by the hot wire, neutral wire, and finally, the load or output wire. Make sure that each connection is secure before proceeding to the next one.
- When wiring multiple toggle switches together, use a separate ground wire for each switch and connect the wires to the corresponding terminals on the toggle switch. Make sure that they are connected properly so as not to cause any shorts or overloads.
- When wiring a 4-prong toggle switch in wet locations such as bathrooms or outdoor areas, make sure to use waterproof covers to protect the switch from moisture.
- After wiring a 4-prong toggle switch, test it with a multimeter to make sure that everything is connected properly and that no wires are loose or exposed. Once you are satisfied with the connections, turn on the power at the main circuit breaker box and check that the switch operates correctly. If there are any issues, turn off the power and make adjustments to the wiring as needed.
These 8 safety precautions should be followed when wiring a 4 prong toggle switch. Always remember to take the necessary steps to keep yourself safe while working with electricity. Following these steps will help you to properly wire your switch and ensure that it operates correctly.
Frequently Asked Questions
How Long Will It Take the Project?
It will depend on your familiarity and experience with wiring. A novice may take several hours, while an experienced user could complete the project in about 30 minutes to one hour. It may take additional time if you need to locate the necessary parts.
Do I Need Any Special Tools?
No special tools are required, but you will need a wire stripper and crimping tool to properly connect the wires. You may also need pliers or a screwdriver to mount the switch in its desired location. Specifically, you may need a nut driver for mounting the switch if it screws into place.
Conclusion
Wiring a 4 prong toggle switch is not an overly complicated task, but it does require some basic knowledge and the right tools. With a wire stripper and crimping tool in hand, you can complete this project in about 30 minutes to one hour. Depending on how your switch will be mounted, you may need additional tools, such as pliers or screwdrivers, for installation.
Once completed successfully, having a 4 prong toggle switch installed offers many advantages over traditional switches with fewer connections—including increased safety features and customized control of multiple circuits at once. By following these guidelines on how to wire a 4 prong toggle switch and using the necessary tools properly, you’ll have no problem wiring up your new 4-prong toggle switch!