How to Wire a Float Switch
Do you ever find yourself dreading the seemingly overwhelming task of wiring a float switch? Don’t worry, this is a problem faced by many DIY enthusiasts. For those who are looking to add a touch of elegance and sophistication to their space, then wiring a float switch may be the perfect solution for you! Float switches provide an effortless way to control the lights in your room or home, and they come in all shapes and sizes. From traditional wall-mounted styles to more modern options like smart controlled devices, there is sure to be one that fits your needs.
With the help of this post, we want to make sure that daunting feeling and uncertainty you may be facing will soon become a thing of the past! This step-by-step guide on how to wire a float switch will walk you through all aspects of the process from start to finish—including materials needed, instructions on proper installation, and helpful tips that only experienced technicians know about. So don’t let electrical wiring intimidate your next project or prevent you from creating something truly stunning with your own two hands – get ready for success!
What is a Float Switch?
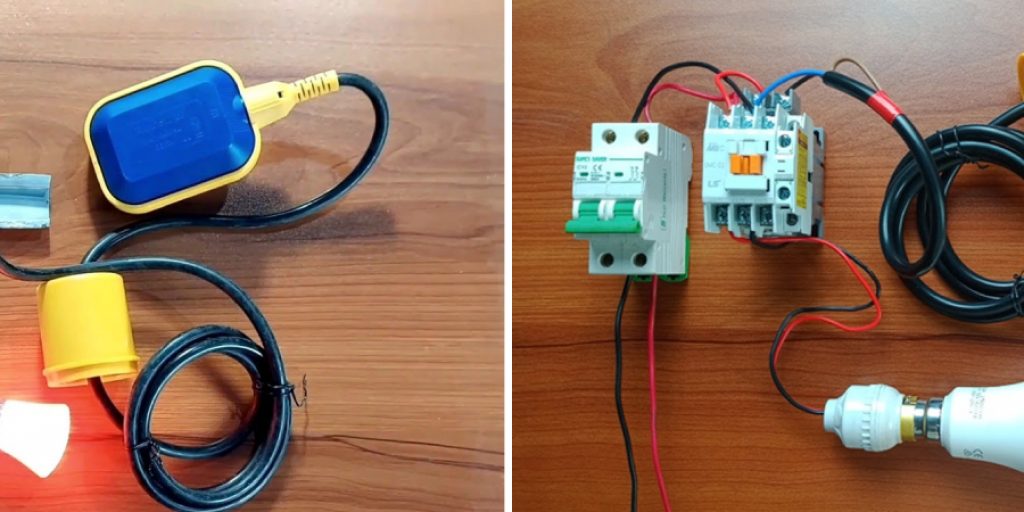
A float switch is a device used to control or measure the level of liquids in a particular tank or container. It consists of a buoyant object that operates contact points that are connected to electrical circuitry, allowing for the activation and deactivation of pumps, alarms, valves, lights, etc. The float switch may be suspended from the top of the tank or mounted on an external wall. The switch is triggered when the buoyant object reaches a certain level, then it either opens or closes the contacts within the device.
Float switches are most commonly used in sump pump systems to control when the pump should start and stop based on the water level in the tank. They are also used to measure the water level in home appliances like dishwashers, toilets, and washing machines. The float switch is an essential device for monitoring and controlling liquid levels in a tank or container.
Is Wiring a Float Switch Difficult?
Wiring a float switch is not as difficult as it may appear, and with the proper guidance, even a beginner can complete this task. It is important to be aware of safety measures when wiring any device, and researching the correct techniques before beginning will ensure success.
Required Items
Before wiring a float switch, there are some necessary items that must be acquired. These include:
- Float switch
- Electrical wiring
- Screwdriver
- Wire cutters/strippers
- Wire nuts
- Waterproof electrical tape or shrink tubing (optional)
10 Ways How to Wire a Float Switch
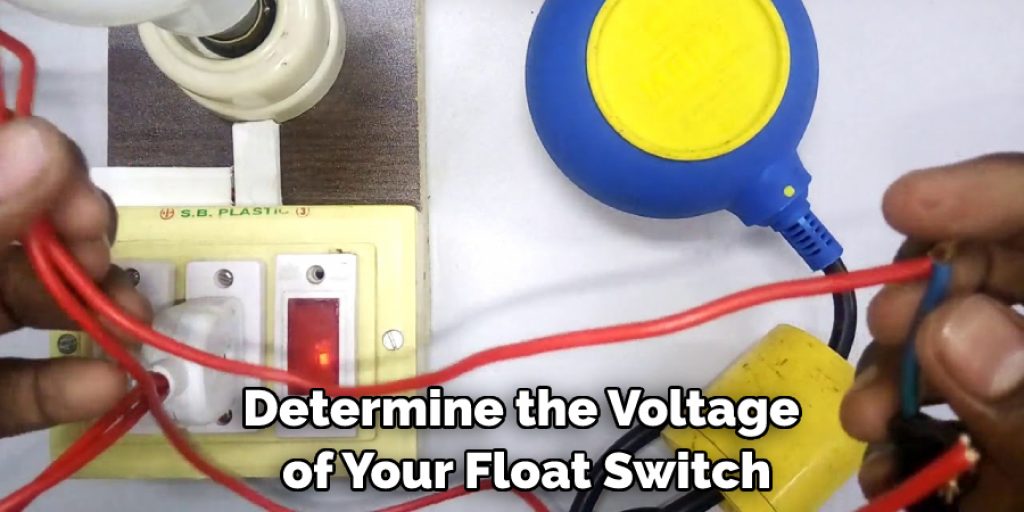
1. Decide on the Voltage
Determine the voltage of your float switch. Make sure you purchase a switch with the correct rating for your application. If you don’t know the voltage, you can measure it using a multimeter. Also, check the current rating of your float switch to ensure it will work for your application.
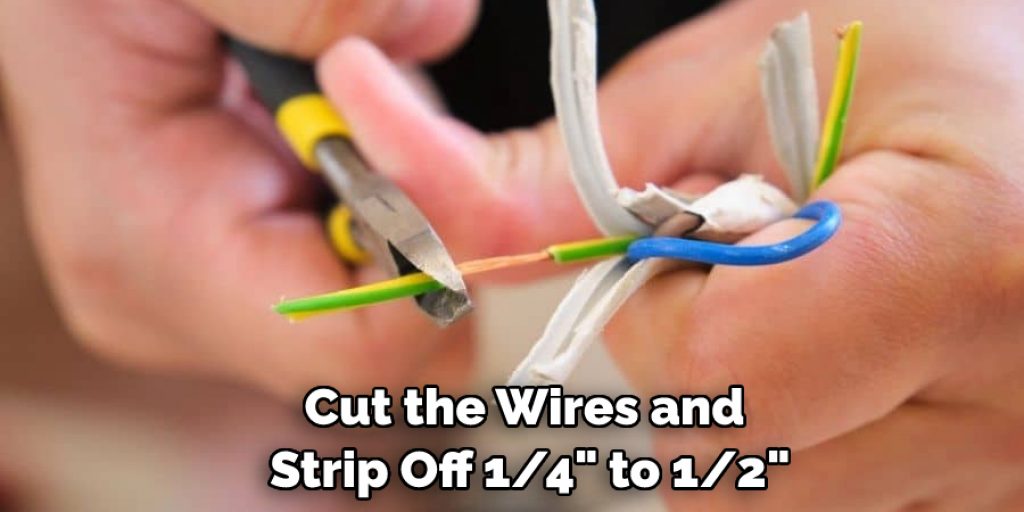
2. Cut Wires and Strip Ends
Cut the wires and strip off 1/4″ to 1/2″ from the end of each wire. This allows you to make a secure connection between the float switch and the power source. The measurement can vary depending on your float switch.
3. Connect the Wires to the Float Switch
Connect the wires from the power source to the terminals of the float switch. Make sure that you follow any directions included with your float switch for correct wiring instructions. Switching is typically done using the black wire for power and the white wire for neutral.
4. Secure Wires
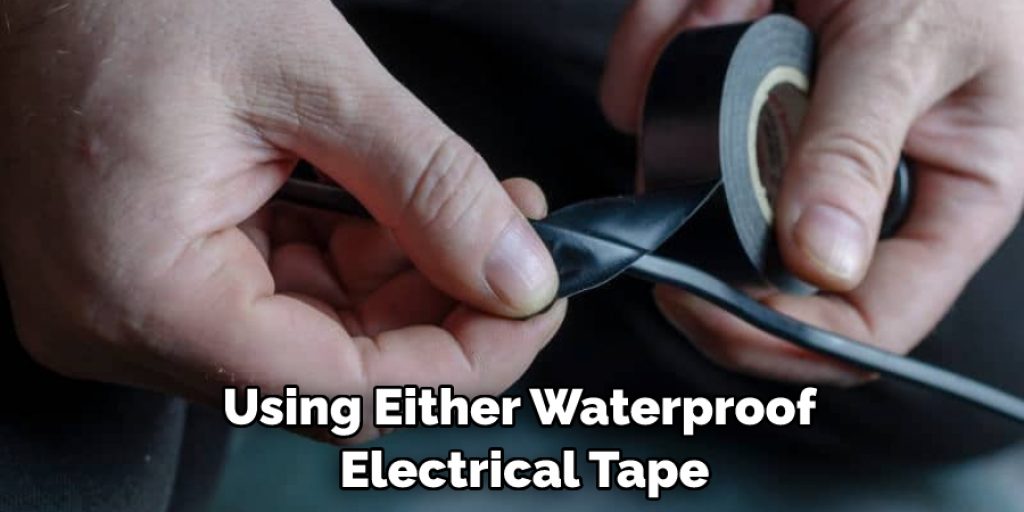
Once all of the wires are connected to the float switch, secure them with either waterproof electrical tape or shrink tubing. This will ensure that the connections remain secure and free from any potential damage caused by moisture or corrosion.
5. Mount the Float Switch
Mount the float switch to your desired location. It is important to ensure that it is mounted in a way that will allow it to move freely and not become stuck or bent out of shape. Floating switches typically come with mounting hardware that can be used to securely fasten the device.
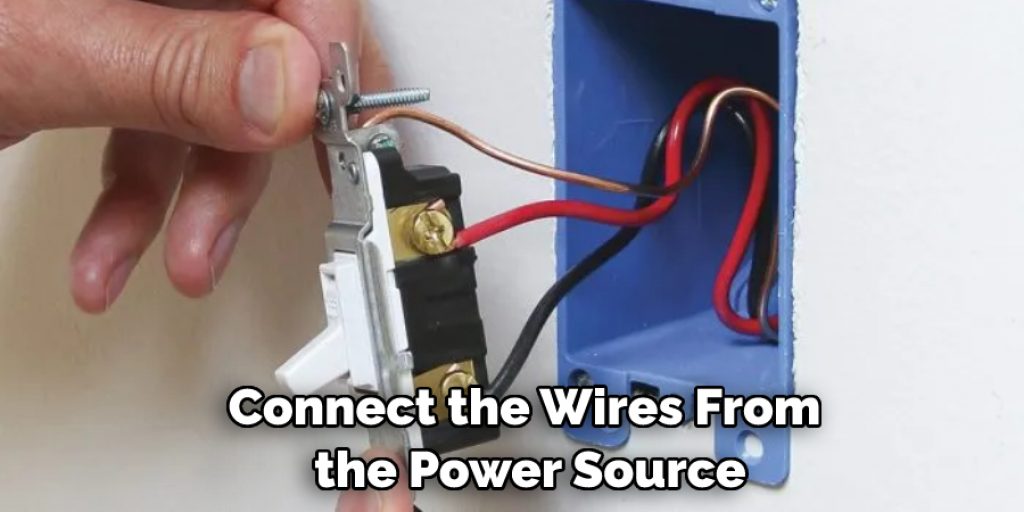
6. Connect the Wiring to the Power Source
Connect the wiring from the float switch to your power source. This will usually be a breaker panel or junction box, depending on where you are installing your float switch. Make sure all of the connections are secure and free from any potential hazards.
7. Turn the Power On
Turn on the power to your float switch and test that it is working properly. It should open and close the contacts as expected when the buoyant object reaches a certain level. Make sure all of the connections are secure before turning the power back on.
8. Test Float Switch
Once the float switch is installed, do a few test runs to make sure that it is working correctly. This will help you identify any issues with the wiring or connections before turning on the power again. Testing will also help you become familiar with the operations of your new float switch.
9. Secure Wiring
Once all of the tests are complete and the float switch is operational, secure any exposed wiring using either waterproof electrical tape or shrink tubing. This will ensure that all of the connections remain safe from potential hazards such as moisture or corrosion.
10. Maintain Float Switch
Finally, make sure to maintain your float switch by testing it regularly and cleaning the contacts with a damp cloth when necessary. This will help keep your float switch in good working order for years to come.
By following these 10 simple steps, wiring a float switch should be an easy task, even for beginners. With a few basic tools and supplies, you can have your float switch up and running in no time.
8 Safety Precautions to Follow
When it comes to wiring your float switch, safety is of the utmost importance. Before beginning the project, there are some safety precautions that need to be taken into consideration. Here are 8 key safety measures to take when wiring a float switch:
1. Make sure you understand all necessary steps and procedures before beginning any work. Understanding all the steps makes the process much easier and helps to avoid any dangerous missteps.
2. Wear all necessary safety equipment, such as protective eyewear, gloves, and a face mask. This will protect you from any harm that might occur during your project. All necessary equipment should be in good condition and properly fitted.
3. Ensure that you have the right tools for the job. The wrong tool could result in an unsafe or incomplete project, so make sure you double-check that everything is correct before starting your work.
4. Make sure all power sources are turned off or disconnected before beginning any wiring or connection. This includes main power sources, as well as any battery or generator-powered devices.
5. Do not attempt to work on the float switch if it is wet. Wait for the float switch to dry before beginning any work in order to avoid shock or electrocution risk. Work when the switch is dry.
6. Don’t forget to ground any electrical equipment or devices that will be connected to the float switch. Grounding helps reduce the risk of shocks and electric fires. Electrical equipment should be connected to a ground system in order to provide adequate protection.
7. Before beginning any work, make sure that all connections are secure and tight. Use the correct techniques when connecting wires, and make sure they are firmly secured with tape or a clamp if needed.
8. After completing your project, always check your wiring for any potential issues. Take the time to double-check all connections and make sure that everything is working properly before placing the float switch in its final position.
Following these safety precautions ensures not just a successful project but also your safety throughout the process. With these tips in mind, you can be confident that wiring your float switch will be an
Conclusion
After viewing the instructions on how to wire a float switch, you should feel confident in not only understanding the process but also be better prepared when you have to complete this task. This project is not as difficult as it may appear, and with the proper guidance, the whole experience can be manageable for a professional or beginner. Regardless of your skill set prior to reading the blog post, the goal was to walk away with the knowledge necessary to develop confidence in wiring a float switch system.
With all of the steps carefully outlined, completing this project and other more advanced tasks related to studying floats will now become easier than ever before. From being aware of correct safety measures and thoroughly reviewing all possible options, your whole experience around float switches will increase in success and accuracy. Be sure to keep these five important steps in mind for any upcoming projects related to wiring a float switch, and have fun while putting them into action!