How to Paint Peg Dolls
Are you ready to get creative and paint your own peg dolls? Crafting your own handmade wooden figurines can be a surprisingly rewarding, therapeutically calming experience that allows for endless levels of creativity! Peg Dolls allow you to transform an inanimate object into something picture-perfect and unique.
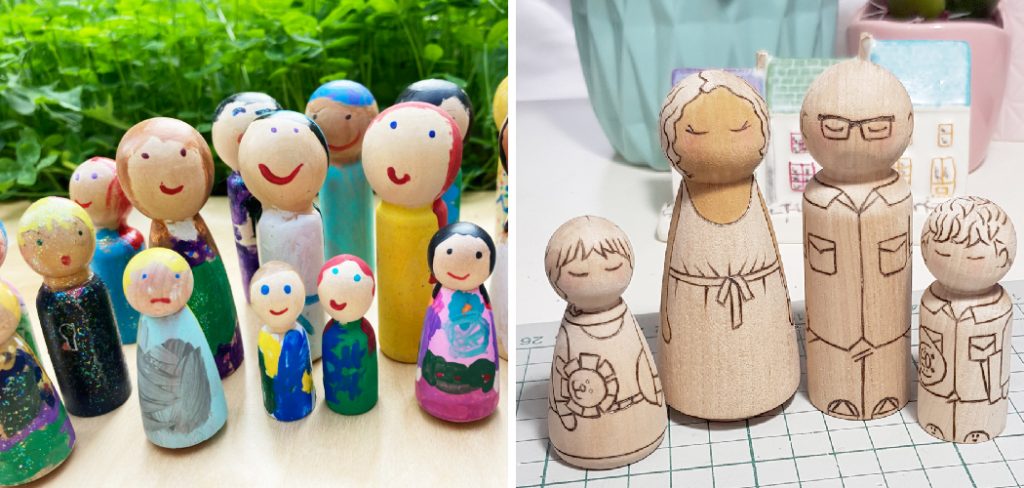
In this blog post on how to paint peg dolls, we will give you all the tips and tricks on how to create beautiful homemade wooden peg dolls with just a few simple supplies. Plus, we’ll teach you the art of painting them from start to finish so they look fantastically fun! So grab your brush and some paints – it’s time for us to get crafting together!
Needed Tools and Materials
Given below is a list of the supplies you will need to start painting your own peg dolls:
- Peg Dolls (of Course!)
- Paint Brushes
- Acrylic Paints in Different Colors
- A Piece of Paper for Practice Strokes or Sketching Out Your Design
- Cotton Swabs (for Cleaning Up Any Mistakes)
- Sealer (for Protecting the Paint From Chipping or Discoloring)
Step-by-step Guidelines on How to Paint Peg Dolls
Step 1: Prepare Your Peg Dolls for Painting
Make sure they are clean and free of any dust or dirt so that the paint will adhere properly. The best way to do this is with a quick blast from an air compressor or by wiping them down with a damp cloth. It is also important to sand the peg dolls before painting them, as this will help create a smoother and more even surface.
Step 2: Pick Your Paint Colors
Choose a few colors that you like together, or mix and match them for a custom color palette. You can use any type of paint you choose; acrylic paints work best for wooden peg dolls, as they are durable and long-lasting. You can even use watercolor paints if you prefer a more delicate look. It’s important to note that lighter colors usually need multiple coats of paint, while darker colors may require fewer.
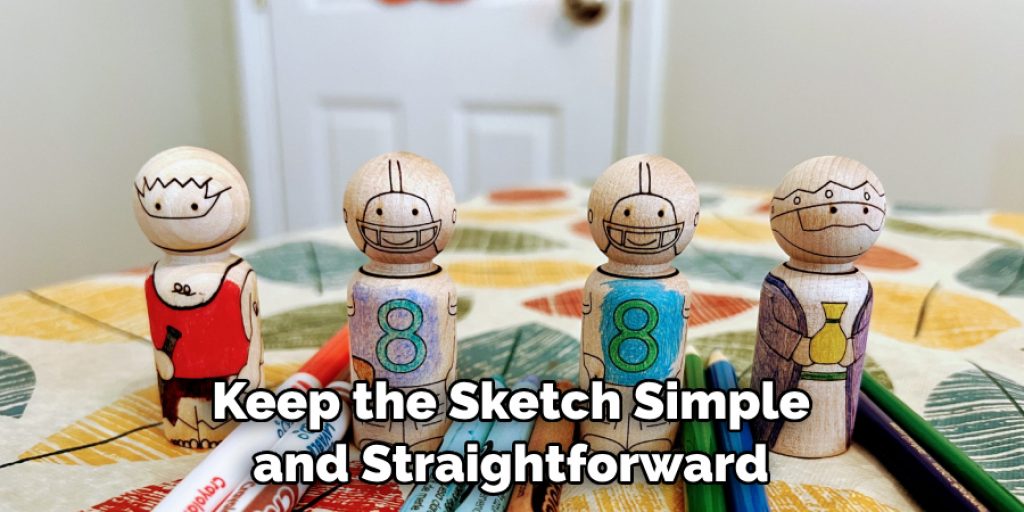
Step 3: Sketch Out Your Design
If you want to practice or draw out your design first before painting it on the peg doll, use a piece of paper to rough sketch the design. This will help you ensure that everything looks just right when you get started. Make sure to keep the sketch simple and straightforward. It doesn’t have to look perfect, as long as it gives you the overall idea of what you want your peg doll to look like.
Step 4: Start Painting
Once you are happy with your design, it’s time to start painting! First, gently dip the paintbrush into the paint and lightly tap off any excess onto a paper towel. Carefully begin applying the paint to your peg dolls; take care to follow your sketch as closely as possible. But don’t worry if you make a mistake – it can be easily cleaned up later with a cotton swab. This is also a great time to get creative and add unique details that really make your peg dolls stand out.
Step 5: Clean Up Mistakes
No need to worry if you make a mistake while painting – just use a cotton swab dipped in some warm water to gently erase any mistakes or smudges. This can also be used to carefully erase any lines or other details that you might have painted too heavily. This is especially useful if you are using watercolor paints, as they tend to be more delicate than acrylics.
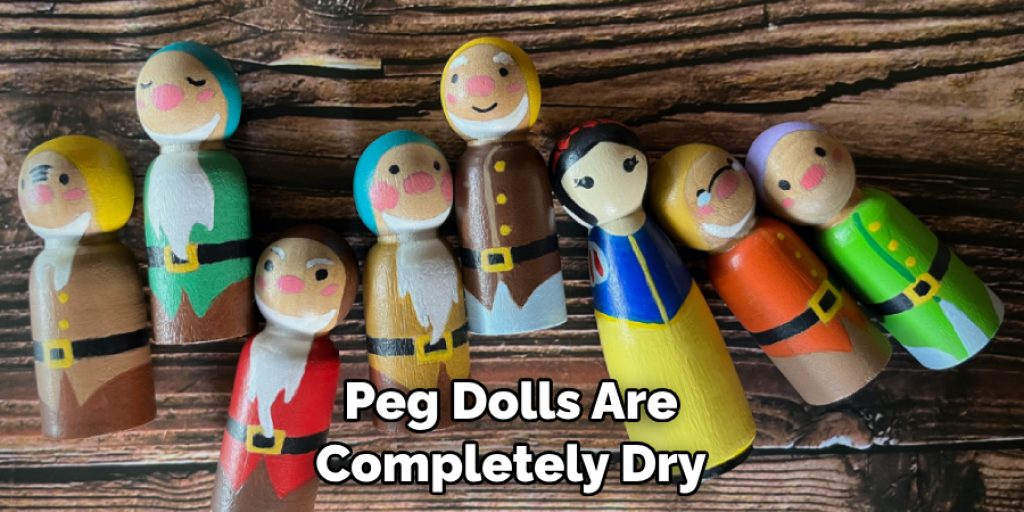
Step 6: Let the Paint Dry
Once you have finished applying your design, let the peg dolls dry completely before doing anything else. Depending on the type of paint you use, this could take up to a few hours – so be patient! However, if you are using watercolor paints, they will usually dry much more quickly.
It is important to make sure the paint is completely dry before moving onto the next step, as this will help prevent any smudges or discoloration of your design. But if you do make a mistake after the paint has dried, you can always go in with some more paint or use a cotton swab to clean it up.
Step 7: Add Details
If your design includes any finer details, such as eyes or facial features, now is the time to add them in with smaller brushes and more concentrated paints. It is important to be very careful in this step, as the details are what will really make your peg dolls come alive! If you want extra protection for the paint on your peg dolls, you can also use a sealer once they are completely dry; this will help prevent any smudging or discoloration over time.
Step 8: Seal the Paint
Once all of the details have been added and your peg dolls are completely dry, it’s time to seal the paint with a sealing agent such as Mod Podge or clear acrylic sealer. This will help protect the paint from fading or chipping over time. If you are using a sealer that requires mixing with water, make sure to follow the directions carefully and apply it evenly for best results.
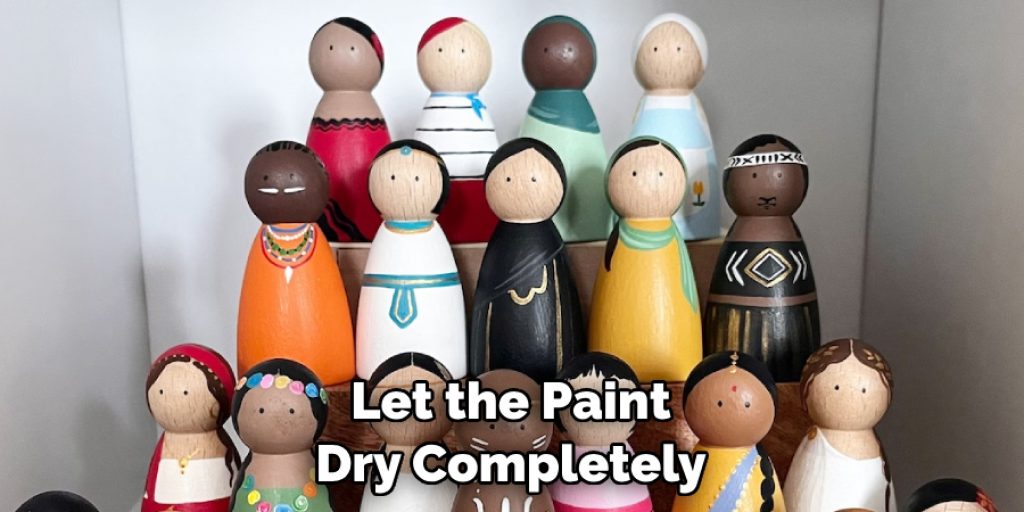
Step 9: Let the Sealer Dry
Allow the sealer to dry completely before moving on to the next step. This may take a few hours, so make sure you are patient and wait until everything is dry before proceeding. You can also use a hairdryer on a low setting to speed up the drying process if needed. It is important to make sure the sealer is completely dry before handling or displaying your peg dolls, as this will help protect them from any potential damage.
Step 10: Add Accessories
Now that your peg dolls are finished, it’s time to add any accessories such as wigs, hats, or clothing. This is a great way to personalize your peg dolls and make them truly one-of-a-kind! It’s also a great way to bring out any unique details or features in your design. You can find a variety of accessories online or at your local craft store.
Step 11: Enjoy Your Masterpiece
Congratulations – you’ve just created some beautiful handmade peg dolls! Now all that’s left to do is bask in the glory of your craftsmanship and enjoy your beautiful masterpiece. It’s the perfect way to show off your creative skills and add some fun colorful characters to your living space. Have fun creating new peg dolls and don’t forget to share them with family and friends!
Following these steps on how to paint peg dolls is the best way to ensure that your peg dolls turn out to look perfect. With some patience and practice, you’ll soon be creating one-of-a-kind works of art! Have fun with it and don’t be afraid to experiment – the possibilities are endless when it comes to painting peg dolls.
Tips for Painting Peg Dolls
- Take Your Time and Be Patient; Painting Peg Dolls Can Take a Bit of Practice Before You Get It Right.
- Don’t Forget to Seal the Paint With a Clear Sealer or Mod Podge. This Will Help Protect the Paint From Chipping or Fading Over Time.
- Experiment With Different Designs and Colors to Make Your Peg Dolls Unique.
- Have Fun and Get Creative – There is No Right or Wrong Way to Paint a Peg Doll!
Peg Dolls are a great way to express yourself creatively, as they offer endless possibilities for customizing and personalizing them. With these steps, you will be able to confidently craft your own beautiful peg dolls in no time! So grab those paints and get crafting – we know you’ll love what comes out of it!

Frequently Asked Questions
Q: What Are the Best Paints to Use for Peg Dolls?
A: Acrylic paints are the best type of paint to use when painting peg dolls, they are durable and long-lasting. You can also experiment with other types of paint, such as spray paint or watercolor paints.
Q: What Are the Best Brushes To Use When Painting Peg Dolls?
A: It is best to use a variety of brush sizes when painting peg dolls; this will allow you to create different designs and details. The most popular brush sizes to use are 1-inch, 2-inch, and 4-inch brushes – but you can also experiment with different sizes to see what works best for your project!
Q: Is There a Special Technique To Painting Peg Dolls?
A: Not necessarily; it is all about personal preference when it comes to the technique. However, it is important to use thin layers of paint and make sure that the brush strokes are smooth and even. This will help ensure a consistent finish on your peg dolls.
Q: Do You Need to Seal the Paint After Painting?
A: Yes, it is important to seal the paint with a clear sealer or decoupage with Mod Podge after painting your peg dolls. This will help protect the paint from fading or chipping over time. It is also a good idea to let the paint dry completely before sealing it.
Conclusion
Overall, painting peg dolls can be an enjoyable and creative hobby for anyone of all ages. Not only is it a great way to express individual artistry, but it provides the opportunity to customize miniature characters to your liking. Whether you’re looking to create a toy for yourself or a special handmade gift for someone else, it’s an affordable and simple project that can be as unique as you want it to be.
Keep in mind that when selecting the wood for your dolls, make sure to choose something durable like birch or maple if you plan on using varnish or paint with heavy pigmentation; this will keep everything from crumbling once it’s finished. With just some basic supplies and a bit of talent, you can craft your own amazing peg doll creations! Thanks for reading this article on how to paint peg dolls.
Angela Ervin
Angela is the executive editor of DIY quickly. She began her career as an interior designer before applying her strategic and creative passion to lifestyle and home. She has close to 15 years of experience in creative writing and online content strategy for housekeeping, home decorations as well as other niche efforts. She loves her job and has the privilege of working with an extraordinary team. She lives with her husband, two sons, and daughter in Petersburg. When she's not busy working she spent time with her family.