
How to Put Eyelets in Leather
Do you want to know about how to put eyelets in leather? On the off chance that your definitive answer is in the agreed, we should state you are in the right spot because the whole article is explicitly committed to the pursuers like you. Attempt to trust us!

To become familiar with a compelling strategy for placing eyelets in calfskin, we should follow some major advances and tips and deceives. The most urgent point is we neglected to follow the means; likewise, at that point, there is a conceivable possibility that we probably would not want to accomplish our ideal result.
Aside from these realities, we also need to keep up some careful steps to finish any undertakings without calamities. Much of the time, we disregard these focuses and wind up, raising hell for ourselves.
The excellent news is thinking about all the variables, we have at long last discovered a reasonable answer for you. What is more, we accept after perusing the entire article, you will effectively comprehend the strategy.
Suppose you are happy to concentrate on more profundity about the theme. In that case, we are mentioning you to peruse the remainder of this unique situation and find out pretty much all the less realized focuses confining you from accomplishing your objective! Eyelet pincers are a simple method to place eyelets. This text will let you know the excellent manner to make use of them.
An Overall Overview of the Topic
Eyelets in calfskin adornments can be both enlivening and utilitarian. No matter whether or not you need to feature a current troublemaker look to a cowhide armband, look into some other method to complete a choker, or locate new picks to include gildings, eyelets offer a spotless and finished look to gemstones!
With jewelry and things new extraordinary leather-based embellishing package, a few cowhides, and a little inventiveness is the entirety you will require! Eyelet forceps are a simple method for area eyelets. This text will let you know the first-rate way to utilize them.
Eyelets can fill in as a user or embellishing highlight of a thing. For example, you can contain them as a technique to bind up a bodice or string a drawstring through a sweatshirt hood. Similarly, it can be used as an approach to embellish the tie of a tote or the threshold of a blouse. Even though eyelets may appear to be hard to place into the texture, they are effortless to include. You will make and function the eyelet opening carefully to ensure a solid match. While you have made the opening, it is an honest rely of assembling the eyelet portions to provide about them. You can upload eyelets to a component without or with a first-rate instrument called eyelet pincers.
It could cowl putting an eyelet without the super eyelet forceps, a seat-established press, or a water-powered press. You will require an opening punch, the eyelet device, and a blacksmith’s iron or some likeness thereof with a gap. A cowhide punch is an opening puncture calfskin. The calfskin piece is about on a rigid surface, which might be an element of the toolset, getting rid of a bit roundabout piece that is disposed of.
Regardless of whether you need to fortify openings made in calfskin or improve a bit of cowhide to use as a wristband, choker, or scrapbook page adornment, utilize metal eyelets to take care of business. Utilize a basic strategy and the correct eyelet instruments to attach the accents to the calfskin’s solid bits safely.
The Process of How to Put Eyelets in Leather
1. Measure and Imprint the Gaps.
Measure and imprint the gaps within the armband or un-completed side of the calfskin. Doing this will help you to place the eyelets in the ideal spots.
2. Punch Gaps With a Calfskin Punch.
The best way to make a round hole in a piece of leather is to use a three/sixteen punch-stamped “four.” This will also help to make the eyelets (small metal rings) evenly spaced.
3. Push an Eyelet Thru the Distance.
The completed end of the armband should be outward (the cowhide’s finished side). Then, with the pliers, push an eyelet through the opening and afterward, clinch down the arms of the pliers on either side of the eyelet.
4. Spot the Cowhide.
In order to make a bracelet, you need to first spot the cowhide inside the blacksmith’s iron. After that, you need to position the putting instrument’s point on the completed side of the armband. Once you have done that, you need to snap down on the tool’s arms in order to hammer the eyelet into the set.
5. Hammer the Eyelets in Place.
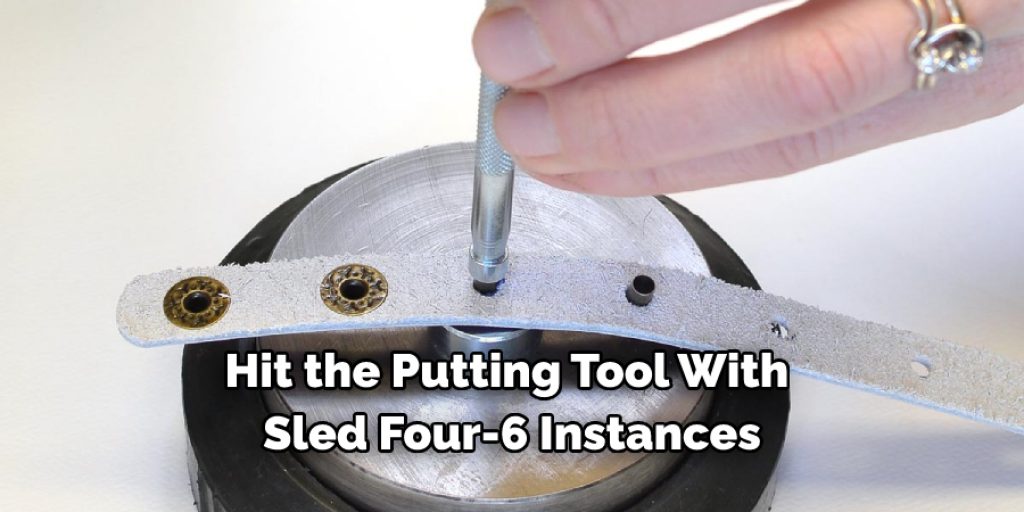
Hit the putting tool with sled four-6 instances. This will ensure the eyelets are fully embedded into the cowhide, so they won’t fall out. Not embedding the eyelets properly can cause the cowhide to tear when you pull on the laces.
6. Twine the Laces.
Attach the laces to the finished side of the leather armband or calfskin piece by threading it thru the holes and afterward tying a knot on the underside. You have effectively embedded eyelets into calfskin!
Another Way of How to Put Eyelets in Leather
1. Cut a gap.
This gap should be sufficiently massive to push your eyelet through. However, if it is far too huge, utilize a leather punch to make the opening marginally littler before continuing.
2. Use a Cushion
Utilize a cushion under the fabric to make a well put together. The pillow is perhaps a rugged cowhide, an acrylic block like the reducing hundreds up utilized in kitchens, or maybe a bit of paper collapsed more often than not. Make sure you preserve the whole lot set up even as making the space!
3. Put It In
To cut the opening, put the cushion under the “awful side” of the material. Apply substantial weight with the forceps or utilize a mallet to drive a gap. Place the eyelet through the hole and snap on the washer and nut afterward. Take care to drive the entire article Eyelets uniformly with even weight, utilizing a mallet if fundamental.
4. Push the Eyelet
Push the eyelet thru the distance you have got made. You have to do this from the perfect side of your cloth, so the level factor is functional. Fold any free strings below the level issue, so they are now not significant.
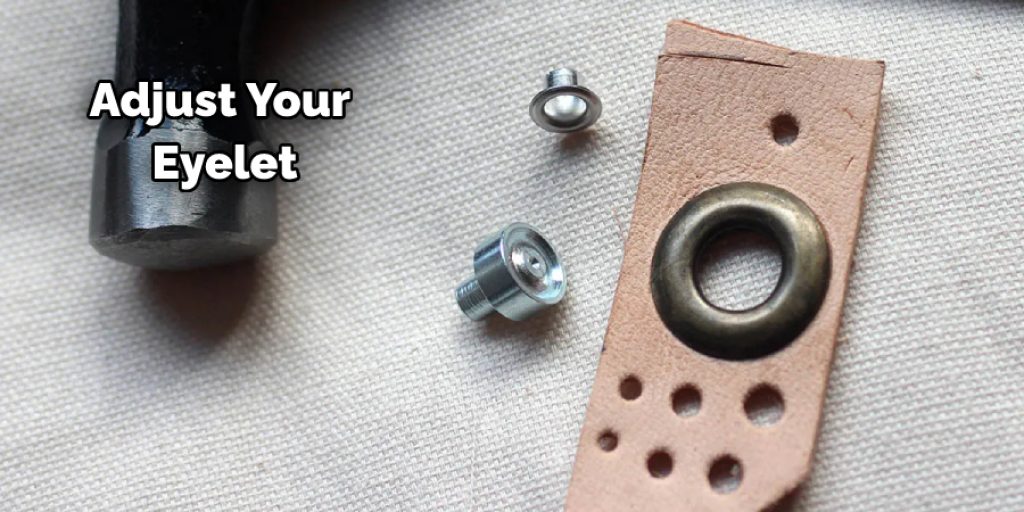
5. Adjust Your Eyelet.
Adjust your eyelet. The extent side needs to sit in the marginally bent side, at the same time as the cylinder aspect of the eyelet has to be lined up the facet of the pliers.
6. Punch the Middle Part
Utilizing either a cowhide gap punch apparatus, around cylindrical gap punch, or as a most pessimistic scenario some scissors, punch an opening the scale of the middle a part of your eyelet.
7. Cut Off the Focal Points
You can utilize scissors on the off chance that you have no other opening punch; we usually cut an x on the focal point of my gap to eliminate the abundance of material if we do it along these lines.
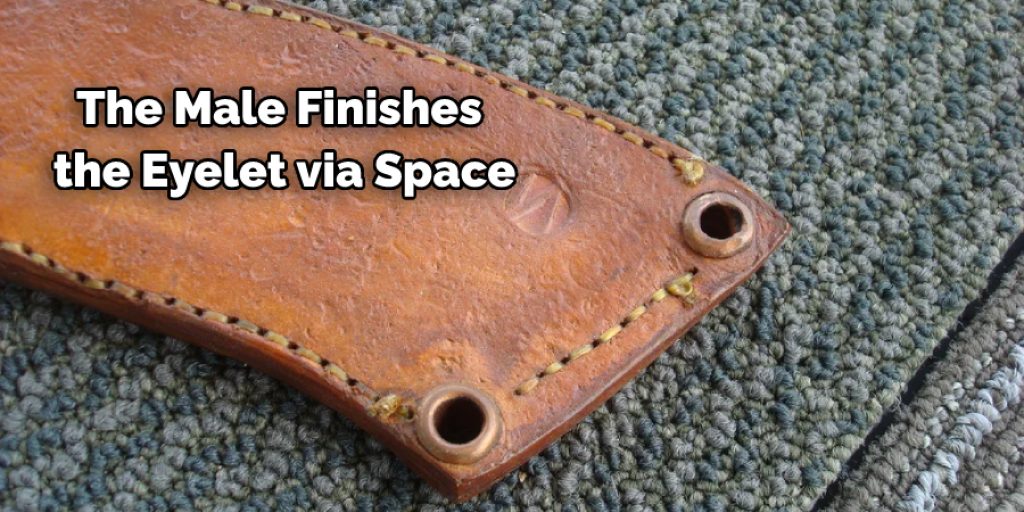
8. Use The Male End
Since your establishing is punched, the male finishes the eyelet via space. It would help if you had the male end as an afterthought that will be generally obvious as this side. The male quit through the gap, location the girl quit, or washing machine over the submit.
9. Spot the Tightened Finish
Utilizing your eyelet equipment and your iron block, location the eyelet inside the blacksmith’s iron with the publish looking up, and the lady ended. Spot the tightened finish of the eyelet apparatus. We discover that some sturdy hits from a steel sled or a couple more significant from a timber hammer are usually paintings.
10. See the End Result
Take a look at ensuring that each of the overabundance cloth has been unfolding, and the eyelet is relaxed, and you are an excellent concept to head.
We have shown up nearly toward the end. We think you have taken in all the pivotal subtleties of how to how to place eyelets in leather at this stage. Hence, you may now execute all your work without needing any extra help or aides.
As a little something extra tip, we should state you should attempt to follow the means that we referenced in the past areas of this article in like manner, and alongside that, ensure you keep up the wellbeing hacks.
On the off chance that you figure out how to do so, no one can make any deterrents in your manner. At that point, for what reason would you say you are as yet pausing? It is the perfect chance to check it out to accomplish your most wanted objective!
The Process of How to Put Eyelets in Leather
1. Measure and Imprint the Gaps.
Measure and imprint the gaps within the armband or un-completed side of the calfskin. This will help you to place the eyelets in the ideal spots.
2. Punch Gaps With a Calfskin Punch.
Use the three/sixteen punch-stamped “four” on the calfskin, as it is the most ideally shaped for a round hole. This, too, will help with the even placing of the eyelets.
3. Push an Eyelet Thru the Distance.
The completed erupted end should be outward of the armband (the cowhide’s finished side). Then, with the pliers, push an eyelet thru the opening and afterward, clinch down the arms of the pliers on either side of the eyelet.
4. Spot the Cowhide.
Spot the cowhide inside the blacksmith’s iron. After that, position the putting instrument’s point on the completed side of the armband, and afterward, snap down on the tool’s arms. This will hammer the eyelet into the set.
5. Hammer the Eyelets in Place.
Hit the putting tool with sled four-6 instances. This will embed the eyelets totally into the cowhide, guaranteeing they won’t fall out. Eyelets that are not embedded well can tear the cowhide when you pull on the laces.
6. Twine the Laces.
Attach the laces to the finished side of the leather armband or calfskin piece by threading it thru the holes and afterward tying a knot on the underside. You have effectively embedded eyelets into calfskin!
Alternative Way of How to Put Eyelets in Leather:
1. Cut a gap.
This gap should be sufficiently massive to push your eyelet through. However, if it is far too huge, utilize a leather punch to make the opening marginally littler before continuing.
2. Use a Cushion
Utilize a cushion under the fabric to make a well put together. The pillow is perhaps a rugged cowhide, an acrylic block like the reducing hundreds up utilized in kitchens, or maybe a bit of paper collapsed more often than not. Make sure you preserve the whole lot set up even as making the space!

3. Put It In
To cut the opening, put the cushion under the “awful side” of the material. Apply substantial weight with the forceps or utilize a mallet to drive a gap. Place the eyelet through the hole and snap on the washer and nut afterward. Take care to drive the entire article Eyelets uniformly with even weight, utilizing a mallet if fundamental.
4. Push the Eyelet
Push the eyelet thru the distance you have got made. You have to do this from the perfect side of your cloth, so the level factor is functional. Fold any free strings below the level issue, so they are now not significant.
5. Adjust Your Eyelet.
Adjust your eyelet. The extent side needs to sit in the marginally bent side, at the same time as the cylinder aspect of the eyelet has to be lined up the facet of the pliers.
6. Punch the Middle Part
Utilizing either a cowhide gap punch apparatus, around cylindrical gap punch, or as a most pessimistic scenario some scissors, punch an opening the scale of the middle a part of your eyelet.
7. Cut Off the Focal Points
You can utilize scissors on the off chance that you have no other opening punch; we usually cut an x on the focal point of my gap to eliminate the abundance of material if we do it along these lines.
8. Use The Male End
Since your establishing is punched, the male finishes the eyelet via space. It would help if you had the male end as an afterthought that will be generally obvious as this side. The male quit through the gap, location the girl quit, or washing machine over the submit.
9. Spot the Tightened Finish
Utilizing your eyelet equipment and your iron block, location the eyelet inside the blacksmith’s iron with the publish looking up, and the lady ended. Spot the tightened finish of the eyelet apparatus. We discover that some sturdy hits from a steel sled or a couple more significant from a timber hammer are usually paintings.
10. See the End Result
Take a look at ensuring that each of the overabundance cloth has been unfolding, and the eyelet is relaxed, and you are an excellent concept to head.
What Is An Enclosed Hole?
An enclosed hole is a space that is closed off on all sides with no opening to the outside. It is often found in walls, ceilings, and foundations. An enclosed hole can provide insulation and protection from the elements. Additionally, they can also be used for plumbing, wiring, or other utility purposes.
When Are Eyelets Used?
Eyelets are most commonly used for binding items such as clothing, bags, and other fabrics. They can also attach cords or rope to outdoor gear like tents and tarps.
Eyelets can be applied using specialized tooling or by hand with help from a hole punch. The item being bound is cut where the eyelet will fit, then the eyelet material is inserted into the hole and crimped using pliers or a special tool to create a secure bond.
Frequently Asked Questions
What Is the Difference Between an Eyelet and a Grommet?
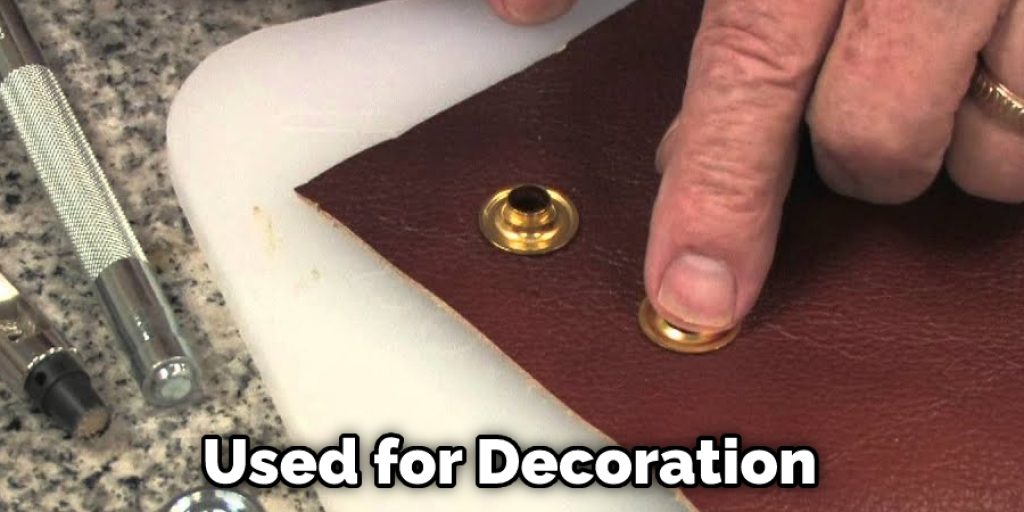
An eyelet is a small, round metal loop with a hole in the middle. A grommet is an elastic cord with holes, which fit an object and hold it tightly together.
Eyelets are usually used for decoration, while grommets are often used as attachments for clothing and other objects to keep them from slipping off or to provide additional support.
Which Is Stronger Eyelet or Grommet?
Eyelet: The eyelet is stronger than the grommet. The eyelet is a piece of metal with an opening that is used to join two pieces of material together by using wire, string, rope, or chain. It was also known as a gimbal eye or pivot bolt and was invented in France in 1792.
What Is the Difference Between Rivets and Eyelets?
Eyelets are used to create a permanent loop in a piece of fabric, while rivets are used to hold two pieces of metal together by creating a permanent bond.
There is also the use of eyelets and rivets in construction. Eyelets are used when building suspension bridges and other structures where you need loops that can be easily removed for maintenance purposes. On the other hand, rivets are mostly used to connect steel beams during construction projects.
Final Thoughts
There you have it, our completed tutorial on how to make a vest of a paper bag. With these simple steps and equipment, you can make your vest to show off to your friends the next day or make it for your child or siblings to have some fun with their friends. Either way, this simplified paper vest will save your worry of finding or purchasing a real vest. This vest is more comfortable with making and will come up with the most satisfying look.
You May Also Read
Elizabeth Davis
Elizabeth is a creative writer and digital editor based in the United States. She has a passion for the arts and crafts, which she developed from a young age. Elizabeth has always loved experimenting with new mediums and sharing her work with others. When she started blogging, she knew that DIYquickly would be the perfect platform to share her tutorials and tips. She's been writing for the blog from the beginning, and her readers love her helpful advice and easy-to-follow instructions. When she's not writing or editing, Elizabeth enjoys spending time with her family and friends.


