How to Sandbag a Door
Do you have a door that is drafty or won’t stay closed? Installing weatherstripping or an automatic closer can help, but sandbagging may be the best solution. Sandbagging is an easy and inexpensive way to fix any troublesome door in your home – all you need is some lumber and kitty litter!
Keep reading for step-by-step instructions on how to sandbag a door so that it stays shut when you want it to stay shut without compromising air quality in your home.
Step-by-Step Guidelines on How to Sandbag a Door
Step 1: Gather Your Materials
You will need 1×2 lumber, kitty litter, and a drill. Gather all of these materials before you begin. The materials should be of good quality to ensure that the sandbagging process is effective. Good materials will also make the process easier.
Step 2: Measure the Door and Cut the Lumber
Measure the gap between the door frame and the door and cut two pieces of 1×2 lumber to fit each side of the door. This will help to support the sandbags and keep them in place. While measuring, make sure to keep in mind that the sandbags will need room to expand and contract.

Step 3: Drill Holes in the Lumber
Use your drill to make holes in the lumber. These holes will be used to hold the kitty litter bags in place and help them stay secure. Be careful not to drill too close to the edges of the wood. If you drill too close to the edges of the wood, the holes could become too wide and cause the sandbags to slip out.
Step 4: Fill the Bags with Kitty Litter or Sand
Fill the bags with kitty litter or sand and tie them off securely. Ensure not to overfill the bags, as this can cause them to break. Tie them so that the bags are not too tight, as this can also cause them to break. For filling the bags, remember that the more kitty litter or sand you use, the heavier the bag will be, and it will better secure your door.
Step 5: Secure the Sandbags in Place
Place the sandbags inside the drilled holes and secure them with screws or nails. Make sure to use a metal screw or nail that won’t rust over time. This will help keep the bags in place and ensure they don’t slip out of position.

Step 6: Test the Sandbags
Once you have secured the sandbags, test them to ensure they are doing their job. Close the door and check to see if a draft is still coming through. If so, add more sand or kitty litter to the bags until the draft is eliminated.
And that’s it! You have successfully sandbagged your door and can ensure the drafty air stays outside. Sandbagging is an easy and inexpensive way to seal up those troublesome doors in your home.
Some Other Ways to Sandbag a Door
1. Reinforce the Door Frame:
If you have a weak door frame, reinforce it with steel brackets or plates to secure it against sandbags better. This will make sure that the weight of the sandbags does not cause damage to your doorframe.
2. Add Metal Layers:
Add metal layers to the door frame and over the sandbags for added strength. This will ensure that the sandbags are firmly and securely in place.
3. Use Adhesive Tape:
For extra security, use adhesive tape or nails to attach metal plates to the sides of your doorframe, so they don’t move around when filled with sandbags.

4. Add Reinforcements:
Adding reinforcements such as wooden beams or steel braces between the door frame and the wall can help distribute the sandbags’ weight and prevent them from pushing down on just one spot.
5. Use Padlocks:
For extra security, padlock all sides of the door with a sturdy padlock and use the sandbags to block any gaps that intruders could use.
With proper preparation, sandbagging a door can become an effective way of keeping you and your family safe from threats. By following these steps, you will be able to keep your home secure with minimal effort.
Important Tips and Tricks to Sandbag a Door
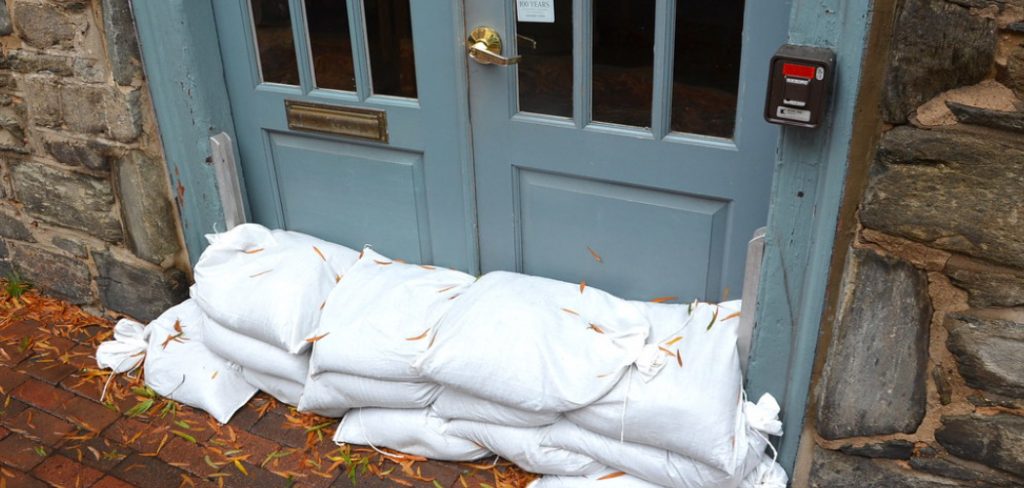
1. Make sure the door is closed and secured shut before sandbagging it; this will prevent any water from entering your home.
2. Determine where you need to place the sandbags. A good rule of thumb is to put them around the perimeter of the door and along both sides of the threshold, making sure the bags are at least 6 inches up from the bottom of the door.
3. Use sandbags that are made specifically for flooding; these will be more durable and will not easily rip or tear when exposed to water and debris.
4. Place layers of plywood behind the sandbag lines to act as a barrier against any water that is able to penetrate the sandbags.
5. Secure the bags with duct tape or bungee cords on both sides of the door to prevent them from shifting in case of flooding.
6. If possible, use a pump to remove any water that may come through the bags continuously; this will help keep your door dry and safe from flooding.
7. Finally, check the sandbags regularly to ensure they are still securely in place and remove any water that seeped through quickly. This will ensure that you have a properly sandbagged door that can withstand any flooding or water intrusion.
Following these tips and tricks will help ensure that your door is sandbagged properly so that you can keep your home safe from flooding. Sandbagging a door may seem like a daunting task, but with the right materials and preparation, it can be done easily and effectively.
Things You Need to Consider for Sandbagging a Door
1. Check the Structure and Integrity of Your Door:
Before doing any sandbagging, make sure that your door is strong enough to hold the weight of the material you are about to use. If necessary, reinforce it with additional support beams or screws so that it can take on the load without compromising its structure.
2. Select the Right Sandbags:
Select the right type of sandbags for your door, depending on your needs. Sandbags are usually made of woven polypropylene or a combination of both and can come in various sizes and weigh differently. Make sure to get enough bags to cover your door’s entire surface area.
3. Fill Up the Sandbags:
After selecting the right type of sandbag, you can then fill it up with gravel or sand. Make sure to use even pressure when filling up the bags in order to avoid any potential bulging or sagging.
4. Seal Up Your Door:
Once the bags are filled, seal them off using duct tape. This will ensure that the contents don’t spill out, even if the door is subjected to the strong force.
5. Position and Secure Your Sandbags:
Position your sandbags around the door frame’s perimeter properly and ensure they are securely fastened with zip ties or bungee cords. Make sure that all gaps are filled in order to prevent any potential force from getting through.
6. Test Your Sandbag Door:
Once you have set up and secured your sandbags, test them out by pushing against them with moderate force. If the door holds, you can be sure it will keep whatever you want to come through at bay.
With these considerations in mind, you should have no problem sandbagging a door and making sure it is secure. Good luck!
Frequently Asked Questions
What Types of Doors Can Be Sandbagged?
Almost any type of standard or custom door can be sandbagged. However, typically the more durable and thicker the door material, the better it will be able to withstand sandbagging.
How Long Does It Take to Sandbag a Door?
The amount of time required for sandbagging a door can vary depending on the size and type of door and any additional materials that may need to be incorporated into the sandbagging process. Generally, it should take between one and two hours to complete the project.
Are There Any Risks Involved with Sandbagging a Door?
If done incorrectly, sandbagging doors can involve some risks, such as structural instability. Following the recommended steps for sandbagging a door is important to ensure it is secure and safe. Additionally, wearing safety glasses while working with hammers and nails can help protect your eyes from potential flying debris.

Conclusion
Sanding your door does not have to be a difficult or time-consuming project. It is an easy job that you can complete with minimal tools and supplies. With the steps we have provided, you will be able to achieve a great finish on the door and make it look new.
Furthermore, once you know how to sandbag a door, you will be able to use this skill again if ever needed in the future. This makes sandboxing doors a worthwhile investment of your time and energy, as it will serve you for many years.
Angela Ervin
Angela is the executive editor of DIY quickly. She began her career as an interior designer before applying her strategic and creative passion to lifestyle and home. She has close to 15 years of experience in creative writing and online content strategy for housekeeping, home decorations as well as other niche efforts. She loves her job and has the privilege of working with an extraordinary team. She lives with her husband, two sons, and daughter in Petersburg. When she's not busy working she spent time with her family.