How to Smooth Walls without Plastering
Are you quite interested to learn about the actual process of how to smooth walls without plastering? If your ultimate answer is affirmative, we will assure you that this article could be the best possible resource for you. To be honest, this work is not possible to complete by a single person. So, you need to gather a group of people for the job. The group will be composed of two types of people.
To learn the practical process of smoothing walls without plastering, you need to follow some fundamental steps and safety measurements. If you could not manage yourself to maintain those steps accordingly, you may not hope to get your desired outcome. It is essential to remove all the nails, screws, or staples with a claw hammer.
Considering all these points, we will provide you with a step-by-step guideline in this article’s next segments. We believe you will quickly understand the process after reading this content if you are willing to study more then just into the following sections! What You Can do First There are many ways to make your website faster, and all of them are quite different. However, all the solutions will have one common thing: they will drastically improve the speed of your website!
Summary: If you are looking for an easy way to smooth walls without plastering, there are a few options available to you. One option is to use a sandpaper stencil. This will create a pattern of sandpaper on the wall that you can follow with a sandpaper brush. Another option is to use a vacuum cleaner to remove the dust and dirt from the wall. Finally, you can use a drywall compound to fill in any gaps or cracks in the wall.
An Overall Overview of the Topic
If you want to divide a room without putting up a wall, there are some things you can do. You can use a piece of furniture, like a bookcase, or you can hang a curtain. You can also use a rope or string to divide the space.
Before you start to sand the walls, make sure you have put down dust sheets and covered any furniture or areas that you don’t want to get dusty. If you are going to be sanding, it’s also a good idea to put down a tarp or sheet to make cleanup easier.
8 Effective Ways on How to Smooth Walls without Plastering:
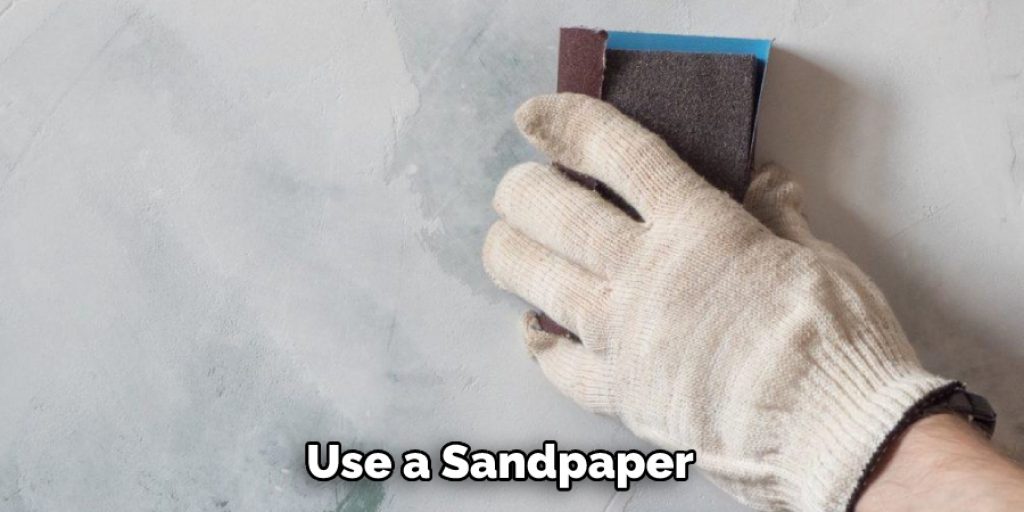
1. Using Sandpaper:
Sanding is not only for wooden surfaces. You can also use sandpaper to smooth down the walls. It would help you eliminate all the bumps and uneven surfaces in your wall. This is the best way to make your room look new even when it has cracks. You can buy sandpaper in any local hardware store, depending on the size of your room. You can rent a sander from them or purchase one if you want to use it for more projects in the future.
2. Using Elbow Grease:
This is perhaps the most commonly used way to smooth a wall without plastering. All you need to do is rub the wall with a damp cloth. You can add some soap for better results. This will remove the loose particles from the wall and give it a smooth surface which you can paint or wallpaper later on if you want to.
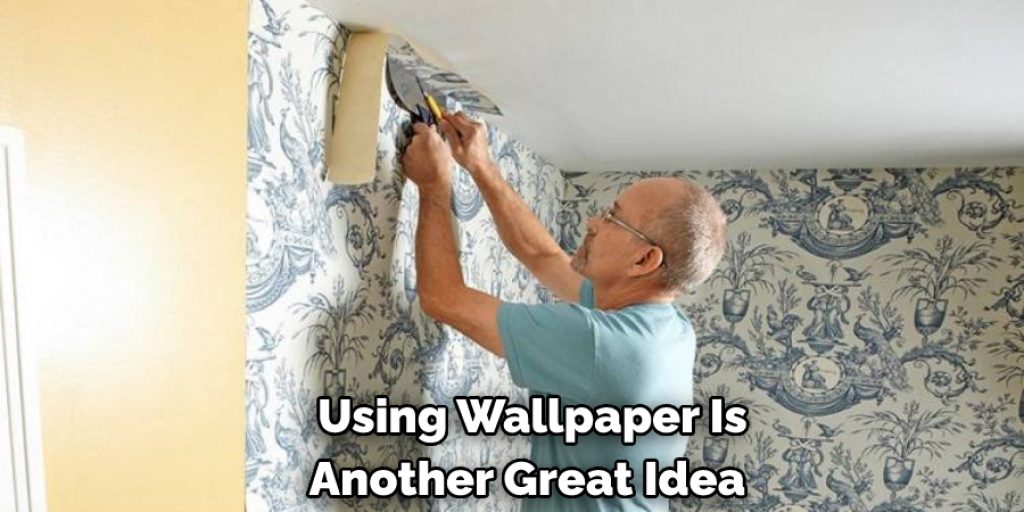
3. Attach Wallpaper:
Using wallpaper is another great idea to smoothen the walls without plastering. You can either purchase or rent a wallpaper steamer that heats water and then sprays steam on the wall, which melts all the particles. Then, you can attach your favorite wallpaper with an adhesive. If you are renting one, make sure to ask them for tips and techniques before purchasing one.
4. Using Wood Filler:
Wood filler is a great way to smooth walls without plastering. You need to add some water in wood filler and then rub it onto the wall or ceiling with your finger until it becomes smooth. This is another DIY project that you can do yourself when you have a free weekend. You can also purchase wood filler from the store and add some water to it when needed.
5. Using a Light Texture Paint:
If you are looking for a quick fix, you can use light texture paint to smooth down the wall. This is often used when people move into their new apartments and want to get rid of the old look quickly. First, you need to apply it to your wall and then give it some time to dry. Once it’s dried, you can paint or wallpaper it.
6. Using a Drywall Mud:
This method requires the least amount of money and time. You need to use drywall mud, apply it onto your walls with a damp cloth, and then dry it out for at least 30 minutes. Then, if you want, you can go ahead and paint or wallpaper it. This is an effective way of making your walls smooth without plastering them.
7. Using a Texture Coat:
Texture coat can be found in most hardware stores and comes in three different types, light, medium, and heavy textures. You need to mix the texture coat with water according to the package’s instructions and then use a roller to smooth it out on your wall. Once it dries, paint or wallpaper it, and you’re done.
8. Using a Float Finish:
This is yet another way that requires the least amount of time and money because all you need to do is buy float finish from your local hardware store, apply it onto your wall and then leave it overnight. Then, the next day, paint your wall as you like. This is a great way to smooth walls without plastering.
These were eight effective ways how to smooth walls without plastering. Apply one of these methods and get rid of all your bumps and uneven surfaces quickly and effectively. Remember that the cost depends on the chosen method, so choose wisely depending on your budget and expectations.
Step by Step Process: How to Smooth Walls without Plastering
Step 1: Fill the Division Gaps
Before tidying up scrapes or sanding your dividers, you must ensure you have filled any division gaps. While employing somebody to smooth your partitions, they will frequently do this first, alongside different cycles that will be shrouded in further detail beneath.
Filling your dividers earlier than sanding guarantees a fashionable, comfortable final touch, with no holes in the middle. It’s also an easier and cleaner cycle to sand if you take away all the caulking first, including a much less-messy installment course.
Step 2: Sanding Your Divider
Sanding your divider is a key step to the whole smooth walls without a plastering procedure. Numerous people who have been left to complete this cycle without help from an expert point out that they’re bowled over by just how much grime and dust sanding generates.
Sanding has the benefit of making the surface area feel mild and clean without taking off the complete layer of your divider. This is an ideal opportunity to smooth any troublesome scrapes or trouble locations that have been brought on by pets or children or by you!
Step 3: Recruit an Expert
If you hope to smooth your walls without putting them, the ideal decision is probably sanding. Recruiting a temporary worker to smooth your partitions will, without a doubt, incorporate this.
Recruiting an expert to sand your dividers is your smartest choice. They will likely utilize an electric sander – a fast and smooth option for enormous scope ventures. They may also use a wet and dry model for smaller scopes, which is adaptable.
Step 4: Tape it Off
It’s a decent time to begin the dyeing cycle while partitions are being sanded because you can easily get to dye straight to your divider. Ensure you have taped off all flooring items that you do not need to color.

Step 5: Dyeing the Walls
Apply an undercoat of paint color, covering all regions entirely by using a paintbrush or sponge. This will provide your following layer of extra color quantity and help it go on more smoothly. After the undercoat has dried, use a good coat of color to end up your smooth back walls.
Step 6: Apply a Coat of Gloss
Make certain you’ve coated the whole wall in gloss. For best outcomes, ensure you apply this coat through a paintbrush. While it might have to be sanded back down for any tough spots, the gloss will give your partitions shine and depth.
Step 7: Apply Top Layer of Color
With your top color now dry, apply a second coat as you did the first. You might choose to go for a lighter shade this time to add extra depth and shading. Make certain to go carefully round any grime or scrapes that have been filled in previously which are now on the show again.
Step 8: Leave it to Dry
You’ll have to leave your walls to dry for several hours, relying on the size of the job. In any other case, you could not end up with an even color covering completely. At this point, congratulate yourself on having simply completed a huge painting venture!
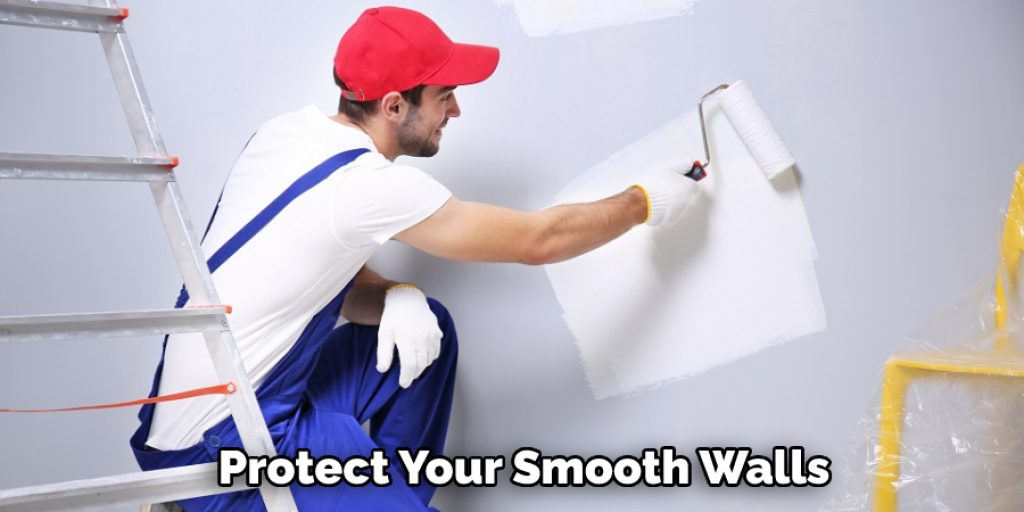
Step 9: Protect Your Smooth Walls
The final step to sanding and smoothing is protecting your completed work with a polyurethane layer. This will guard your smooth walls for years to come, so it’s a nice half in which you can go away from the work to experts.
Step 10: Cleaning Up
As soon as you’re carried out with your smooth walls without a plastering cycle, it’s time to consider down the drop sheets and dispose of any waste materials. Again, it might be alluring to leave this for tomorrow, but it’s a good suggestion to do it immediately; you’ll be less tempted to depart this task for later on.
Some Helpful Tips and Advice:
1. When using a sponge or paintbrush, be sure that you do not over-apply the dye as it’ll make an overly thick layer. If this happens, employ a clean towel to wipe the dye off of the wall until it disappears.
2. Be sure that you are not applying too much pressure when taping or wiping your sponge/brushes because this can cause ridges in your material and create an uneven surface for your paint to stick to.
3. If you have a textured wall, use sandpaper to smooth the surface before applying the dye.
4. If you are using an airless sprayer, be sure that you lightly mist your walls so that they don’t drip or run when they dry.
5. Cover your legs and any exposed skin while working with aerosol sprayers to avoid the dye staining it.
6. When applying multiple coats, be sure to wait until the first coat has dried before adding a new one so that you don’t have a hard time using it evenly. This is especially helpful when you are applying a wet coat on top of a dry coat as it will create lumpy areas if you do so.
7. For tough spots, take your sponge and dip it in the dye container to apply directly to those stubborn areas until they are covered evenly with color.
Conclusion
The idea of smoothing walls without plastering is a more cost-effective way to update your home. It’s also eco-friendly and can save you money in the long run by reducing energy consumption. You can smooth walls without plastering by using a variety of methods. Which method you choose will depend on the condition of your walls and the tools you have available.
We hope this blog post on how to smooth walls without plastering has been helpful. By following these simple steps, you can create a smooth surface ready for painting or wallpaper. If you have any questions or want to know more, then feel free to comment below!
you may read also –
Elizabeth Davis
Elizabeth is a creative writer and digital editor based in the United States. She has a passion for the arts and crafts, which she developed from a young age. Elizabeth has always loved experimenting with new mediums and sharing her work with others. When she started blogging, she knew that DIYquickly would be the perfect platform to share her tutorials and tips. She's been writing for the blog from the beginning, and her readers love her helpful advice and easy-to-follow instructions. When she's not writing or editing, Elizabeth enjoys spending time with her family and friends.