How to Use a Noid Light
Are you an auto enthusiast looking to get the most out of your car’s engine performance? One way to do that is by using a noid light. A noid light is one of the handiest tools in any mechanic’s toolbox because it can quickly tell you if there’s something wrong with your car’s fuel injection system.
In this article, we will provide a step-by-step guide on how to use a noid light and what you can do with it once you have it connected to your vehicle’s fuel injectors. With just a few simple steps and minimal effort, you can start enjoying improved engine performance right away!
How Does Noid Light Work?
Noid lights are an essential tool used to troubleshoot fuel injection systems. They work by connecting to the fuel injector harness, allowing current to flow through the light and illuminating it when voltage is applied by the ECU (Engine Control Unit).
When this occurs, it indicates that the ECU is providing a signal to activate the fuel injector, allowing fuel to be delivered. If the light does not illuminate when voltage is applied, it means that there is a problem with either the wiring or the ECU itself, and troubleshooting may be necessary.
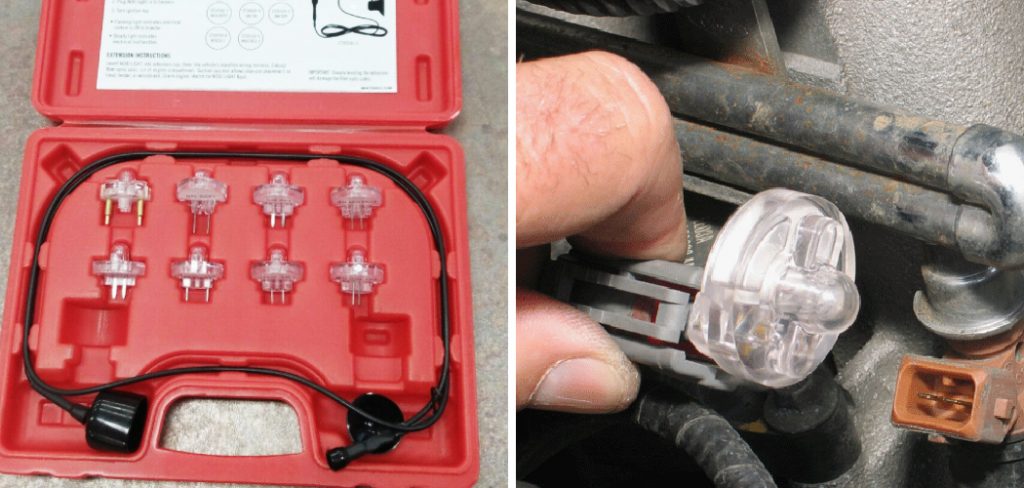
In order successfully use a Noid light, it must first be connected correctly. This typically involves connecting one lead of the light to a power source and the other lead to the appropriate injector wire in the fuel injection wiring harness. The next step is to crank or start the engine, allowing voltage to be applied through the Noid light.
If it illuminates, then it confirms that the ECU is providing a signal and can effectively control fuel delivery. If the light does not illuminate, then it is likely that there is an issue with either the wiring or the ECU itself, and further troubleshooting may be necessary.
Noid lights are a simple but effective tool for diagnosing fuel injection systems and can save time when troubleshooting complex problems. They are relatively easy to use, but it is important to be aware of the potential danger of working with electrical components.

8 Methods How to Use a Noid Light
1. Inspecting Car Engines
One of the most common uses for a noid light is to inspect car engines. The light can be used to check for electrical issues in engine wiring harnesses. It can also be used to check injector pulse signals and ignition coil signals.
By connecting the noid light to an injector pulse signal or an ignition coil signal, the user can easily diagnose electrical problems in the engine. When the light is connected to a signal, the user can see if all of the signals are functioning properly or if there are any problems one or more of the signals.
2. Checking Fuses
Another common use for noid light is to check fuses. If a fuse is blown, the noid light will not illuminate. This can be helpful when trying to troubleshoot an electrical issue. To check a fuse with a noid light, first, locate the fuse you want to test. Make sure that the switch on your noid light is in the “on” position.
Touch the metal tip of the noid light to both sides of the fuse. If the noid light does not illuminate, then the fuse is likely blown and needs to be replaced. It is important to remember that a noid light does not always indicate a blown fuse; it may just mean that the circuit is not receiving any power.
3. Testing Batteries
A noid light can also be used to test batteries. Simply connect the positive and negative leads of the noid light to the positive and negative terminals of the battery. If the battery is good, the noid light should illuminate. If the light does not come on, then the battery is likely dead and needs to be replaced.
If the light flickers or blinks, the battery is weak and should be recharged as soon as possible. Although noid lights are not the most accurate way to test batteries, they can provide a quick and easy diagnosis. While connecting the noid light to the battery, it is important to be aware of any sparks or arcing that could indicate an issue with the battery.
4. Checking Electrical Connections
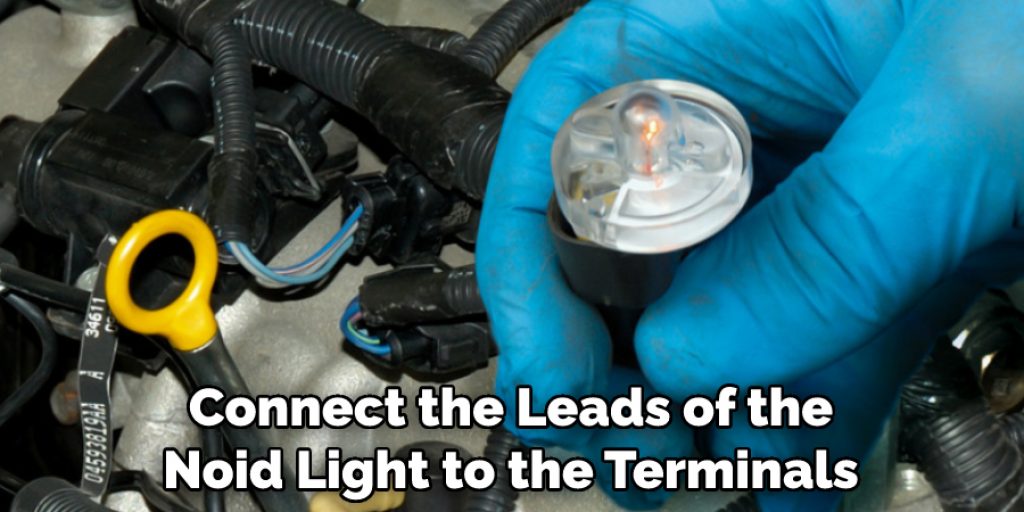
Another use for a noid light is to check electrical connections. This can be helpful when troubleshooting an electrical issue. Simply connect the leads of the noid light to the terminals of the electrical connection in question. If the connection is good, the noid light should illuminate. If the connection is faulty, the noid light will not illuminate.
This can help pinpoint any issues with electrical connections preventing the system from functioning properly. It’s important to note that a noid light will only tell you if the connection is good or bad, it won’t give you any information about why it’s not working. For more detailed troubleshooting, a voltage meter may be needed.
5. Checking Spark Plug Wires
A noid light can also be used to check spark plug wires. Simply connect the leads of the noid light to the terminals of the spark plug wire in question. If the connection is good, the noid light should illuminate. If the noid light does not illuminate, then the spark plug wire needs to be replaced.
If the connection tests good, but the engine is still not running properly then a further test should be performed to check for proper spark output. When finished, be sure to disconnect the noid light. Try to avoid touching the metal parts of the noid light when disconnecting, as this can cause a spark that could damage sensitive components in the vehicle.
6. Checking Fuel Injectors
A noid light can also be used to check fuel injectors. Simply connect the leads of the noid light to the terminals of the fuel injector in question. If the connection is good, the noid light should illuminate. If the connection is bad, the noid light will not illuminate. This can be used to test for clogged or dirty fuel injectors that are unable to deliver fuel as they should.
When testing for a bad injector, it is important to check all the injectors in the system. This will ensure that the entire fuel system is working properly and that the issue is not just isolated to one injector. By using a noid light, it can be determined whether or not an injector needs to be replaced or cleaned.
7. Checking Ignition Coils
A noid light can also be used to check ignition coils. Simply connect the leads of the noid light to the terminals of the ignition coil in question. If the connection is good, then I light should illuminate. If no light illuminates, then the connection is bad and needs to be replaced.

In some cases, a faulty ignition coil may cause the light to “flicker” or flash. This can indicate a problem with the coil, and it should be replaced. Remember to always use caution when working with a noid light and other automotive components.
8. Other Uses
A noid light can also be used for other automotive diagnostics and troubleshooting. It can be used to check wiring harnesses, identify broken wires, and diagnose fuel injection problems. With a noid light, you can check the electrical signals going to various sensors in the engine compartment.
This can help pinpoint the exact spot where an issue is occurring. In some cases, it’s even possible to trace wiring back to its original source! Additionally, as a professional mechanic, a noid light can be used to check for shorts and open circuits in various electrical components.
Things to Consider When Using a Noid Light
1. Always Wear Safety Glasses when Using a Noid Light.
This will protect your eyes from potential sparks and other debris that could be released while testing.
2. Check Cables and Connections for Damage before Use.
Inspect all connections and cables for any signs of damage, including fraying and corrosion. Replace any damaged or worn out cables before use to ensure safe operation.
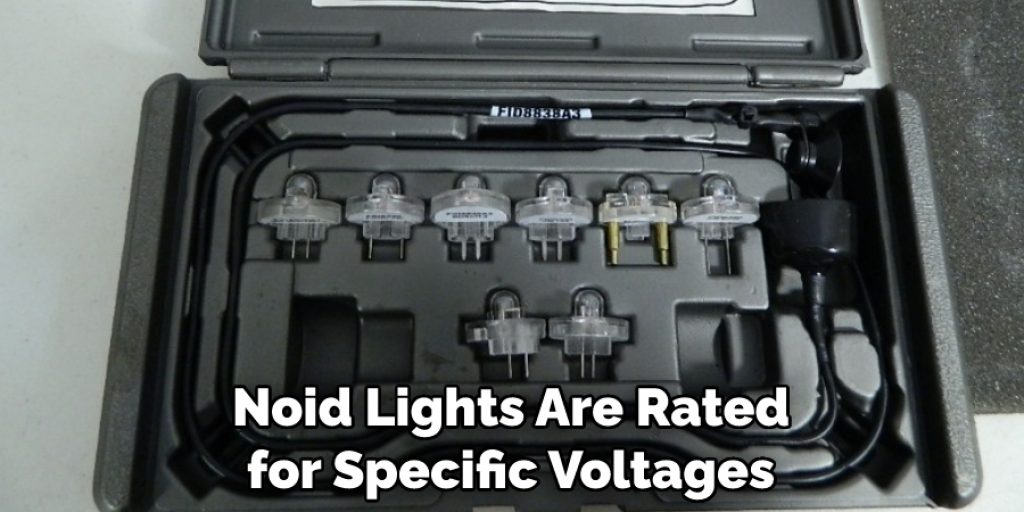
3. Make Sure the Voltage is Correct for the Noid Light.
Noid lights are rated for specific voltages, so make sure your light is being used with the right voltage rating for your specific model.
4. Follow the Manufacturer’s Instructions for Use.
The manufacturer’s instructions will provide you with the most accurate information on how to use your particular Noid light correctly.
Conclusion
All in all, we’ve covered some key information when it comes to learning how to use a Noid Light. While this tool might seem complex, it’s actually quite simple and can be done with ease once you understand its components. A Noid Light is an essential tool to have on hand if you wish to diagnose ignition, fuel injection, and overall computer system problems.
The procedure for using a Noid Light involves testing the spark plug wire and eletrical connectors under the hood of your car, and then attaching the appropriate light probe–in most cases either green or black–to connect to the ignition coil driver control circuit or injector control ground circuit. It can be an intimidating task, but remember that any questions you have can be answered through careful research or communication with a trusted mechanic.
Louis Wein
Louis has always been fascinated by cars. He loves the way they look, the sound of the engine, and how they make him feel when he's driving. He is always keen to learn more about different mechanics of cars and how the engine contributes to other aspects of the car. As an automotive technician with over 10 years of experience, he knew how they worked and loved taking them apart to see how they went back together. He was especially interested in the mechanics of combustion engines and loved finding ways to make them more efficient. He loves to work on cars and help people keep their vehicles running smoothly. As a senior editor, he enjoys contributing to Diy quickly because it allows him to share his knowledge and expertise with others.