How to Wire a Switch Loop
Wiring a switch loop is an important part of any home electrical wiring project. It allows you to control lights or other devices from multiple locations, such as at the top and bottom of stairs or in different rooms. The basic idea behind switch loops is simple; one wire carries power from the main panel to a light fixture, and another wire takes power back to the switch.
In this way, when you flip the switch up or down, it will send a signal through both wires that will either turn on or off whatever device is connected to them. This guide on how to wire a switch loop will show you how to properly install a switch loop for your next home wiring project.
Why Do You Need to Wire a Switch Loop?
1. Making Two Separate Circuits
The main purpose of a switch loop is to provide two separate circuits – one that runs from the light to the switch and another that runs from the switch back to the main electrical panel. This allows you to control lights or other devices with multiple switches in different locations. This can be especially useful when it comes to controlling lighting at the top and bottom of stairs or in different rooms.
2. Added Safety
Another advantage of a switch loop is the added safety it provides. By having two separate circuits, you reduce the risk of overloading one circuit and causing an electrical fire. Additionally, by using a switch loop instead of direct wiring, you can easily turn off power to an area without having to turn off all of the power in the entire home.
Required Tools
To wire a switch loop, you will need the following tools:
- Wire cutters
- Wire strippers
- Electrical tape
- Electrical screws and connectors
- Voltage tester
10 Instructions on How to Wire a Switch Loop
1. Turn Off the Breaker
Turn off the breaker. Before you start any home electrical wiring project, it’s important to make sure all power is turned off by flipping the breaker at the main panel. If you don’t know which breaker controls the circuit, you can use a voltage tester to make sure all power is off.

2. Run Wires From the Switch
Run two wires from the switch to the light fixture. Make sure one wire is longer than the other so that there’s enough slack for both wires to reach the light fixture. Be mindful of the locations of any other wires that could be in the wall to avoid creating a short circuit.
3. Run Wires from the Light Fixture
Next, run two wires from the light fixture back to the switch. Make sure one wire is longer than the other so there’s enough slack to make all the connections.
4. Strip the Ends of the Wires
Strip the ends of all four wires using wire strippers. Make sure to strip at least 1/2 inch of insulation off each end of the wires. The ends of the wires should have a small metal core that is exposed.
5. Connect Wires at the Switch
At the switch, connect the two black wires together and cap them off with a wire nut. Then, connect one of the white wires to the bottom terminal screw on the switch, and connect the other white wire to the top terminal screw.
6. Connect Wires to the Light Fixture
At the light fixture, connect the two black wires together and cap them off with a wire nut. Then, connect one of the white wires to the bottom terminal screw on the switch, and connect the other white wire to the top terminal screw. Be sure to use electrical tape to secure any exposed wire.
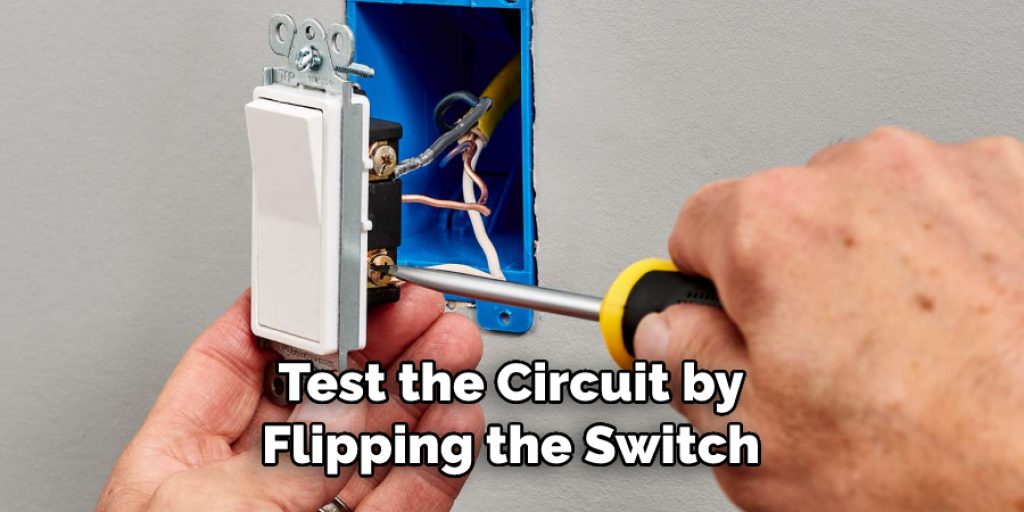
7. Test the Circuit
Once all of the wirings is complete, turn the power back on at the main panel and test the circuit by flipping the switch. If everything works properly, flip off the breaker again and secure any loose wires with electrical tape or screw connectors.
8. Close Up Wall Boxes
After testing the circuit is complete, close up the wall boxes and secure them with electrical screws. The wall boxes are used to protect the wiring and keep it safe from being damaged.
9. Replace Wall Plate
Finally, replace the wall plate on the switch and secure it with screws. This will help protect you and your family from any exposed wires. While replacing the wall plate, make sure all of the screws are tightened and secured.
10. Check for Loose Connections
Once everything is secure, check to make sure there are no loose connections or exposed wires. If you find any loose connections or exposed wires, be sure to fix them before turning on the power again.
By following these steps, you can successfully wire a switch loop and enjoy the added safety benefits. In addition to increased safety, you will also have more control over the lighting in each room of your home. With a switch loop, you can easily turn off power to an area without having to shut down all of the electricity in the entire house.
8 Safety Precautions to Follow
- Wear safety glasses and protective gloves when wiring a switch loop. Protective wear will always protect you from any sparks or electrical shocks that can occur while wiring.
- Make sure to turn off the power before starting the wiring process on a switch loop. This is essential for avoiding electric shock and injury to yourself. It will avoid any short circuits or power surges that could occur.
- Use a voltage tester to be sure no electricity is present in the switch loop before beginning the wiring process. This will ensure your safety and avoid any possibility of electric shock when touching exposed wires during the switch loop installation.
- Verify both sides of the circuit have been turned off before wiring a switch loop. This will avoid any potential problems that can occur when wiring with electricity is still present in the circuit.
- Always use quality electrical wire and tools when wiring a switch loop. Poorly insulated wires or tools may lead to short circuits or sparks which could cause injury or damage to property.
- Use appropriate fittings to ensure tight connections and a safe wiring job. Poorly connected wires can cause electrical shorts, sparks, or shocks. The connection of the wires should be inspected and checked to ensure proper wiring.
- Replace or fix any faulty switches before rewiring a switch loop. This will help prevent potential problems that can occur as a result of faulty switches when starting the wiring process.
- Have an electrician inspect your work after you are done wiring a switch loop. This will assure you have followed all safety precautions and wiring was done correctly. It can also help identify any potential problems or issues before they occur.

Following these safety precautions when wiring a switch loop is essential for your own safety as well as the safety of others around you. Taking the time to properly wire a switch loop and following these safety tips will ensure a safe and successful wiring job.
Frequently Asked Questions
Which Wiring is Best for Switch Loop?
The answer to this question depends on the specific task you’re trying to accomplish. Generally, a 14/2 or 14/3 wire is typically used for switch loop wiring, as it is designed to carry both an ungrounded conductor and a neutral conductor.
Additionally, if you are using two switches instead of one, then you would need to use a 14/3 wire. For further information on the specifics of which wiring is best for the switch loop, it is always advised to consult with a certified electrician or refer to your local building codes.
Do I Need Extra Supplies When Wiring a Switch Loop?
Yes, you will need some additional supplies when wiring a switch loop. In addition to the wires and switches, you will need additional materials such as wire connectors, electrical tape, wire nuts, and other basic supplies. Additionally, it is important to make sure that all of your switches and wiring are up-to-date with any local building codes before beginning the project.
How Long Will It Take to Finish the Project?
The time it takes to wire a switch loop will depend on the specific setup you have and how familiar you are with wiring projects. For general guidance, most switch loops take between two and four hours to complete, although this can vary depending on the complexity of your setup.
It is always important to plan accordingly and ensure that you have all the necessary materials and tools before beginning the project. Additionally, if you are unsure about any of the steps involved in wiring a switch loop, it is always best to consult with a certified electrician for further guidance.
Conclusion
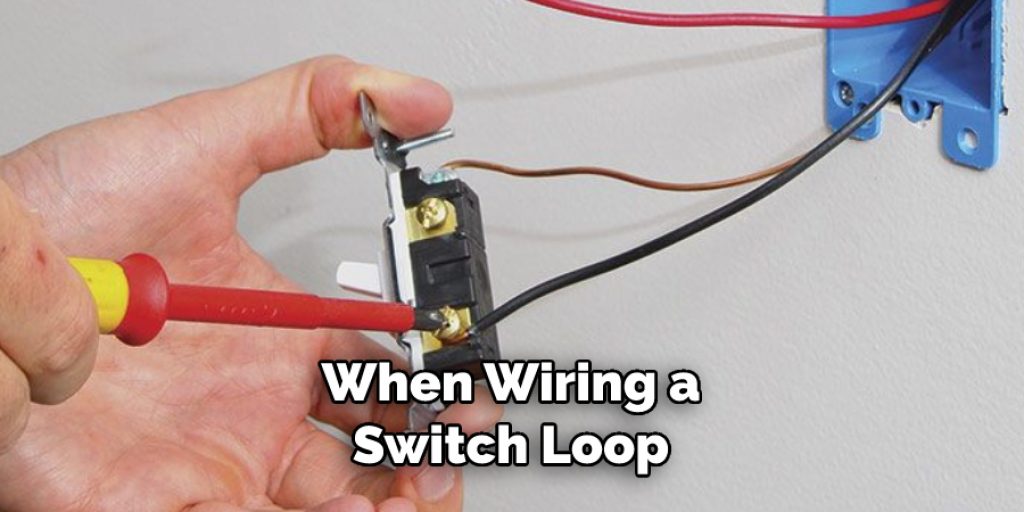
Wiring a switch loop can be an intimidating task, but with the right supplies and knowledge, it is something that anyone can do. When wiring a switch loop, you will need to use 14/2 or 14/3 wire, depending on the type of setup you are working with. Additionally, you may also require additional materials such as wire connectors, electrical tape, and other basic supplies.
Depending on your level of experience and the complexity of your system, this project should take between two to four hours in total. If you ever feel unsure about any step involved in how to wire a switch loop then it’s always best to consult with a certified electrician for further guidance. With these tips in mind, make sure you have all the necessary tools before beginning so that when finished, your home will have reliable power from properly wired switches!