How to Make a Realistic Mask
Masks have been used for centuries in theater and dance to transform an actor into another character. While there are many different types of masks, all masks share one common goal: to conceal the actor’s facial features completely. This blog post will show you how to make a realistic mask using easy-to-find materials.
Making a realistic mask is not as hard as it seems, but there are a few things you need to know to do it right. This article will go over the basics of making a realistic mask using Plaster of Paris. We will also discuss different methods for painting and finishing your masterpiece. So without further ado, let’s get started!
Step by Step Process: How to Make a Realistic Mask
Step 1: Project Overview
To start, print out a picture of a face from the internet. This will be your model so make sure the resolution is high enough for you to work with. Next, we recommend using GIMP ( open source software similar to photoshop) to open and manipulate the picture to make it look as close as possible to your model.
Once you have printed out a face, use a piece of cardstock from a cereal box or something similar that has a bit more thickness than regular paper – this will give your mask enough support when wearing it. Next, tape the image onto the cardstock and cut out the face. This will be your mask pattern, so keep it safe!
Step 2: Cast Your Actor’s Face
Before you can make your mask, you need to make a cast of the actor’s face. There are several ways to do this, but we will discuss our preferred method. First, start by applying Vaseline or baby oil around the subject’s hairline and eyebrows to keep these areas from being captured in your mold. Next, wrap the subject’s head in Saran wrap, covering their hair and eyebrows completely.
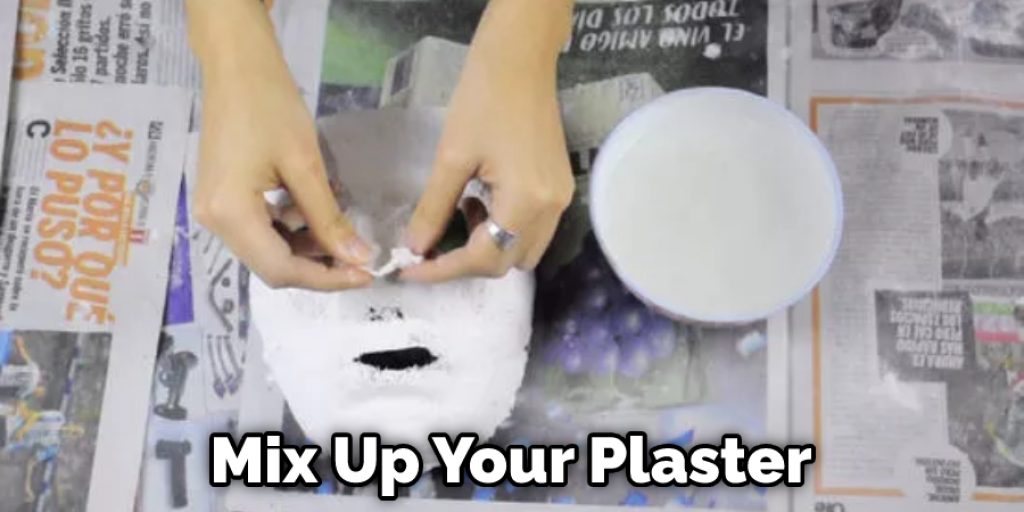
Next, mix your plaster according to the instructions on the package and carefully pour it into the Saran wrap around the face. The plaster should feel cool to the touch but not be cold. If it is cold, allow the mold to sit for a few minutes until it has warmed up to body temperature.
Depending on the thickness of your coat of plaster, you should wait between 1-3 hours before attempting to remove your mask from the actor’s face.
Note: Plaster molds are extremely fragile, so take your time removing the mask to avoid damage.
Step 3: Create the Actor Positive Mold
Now that you have a cast of the actor’s face, it is time to create a positive mold. First, cover any areas of your mold that you do not want to be included in the final mask with wax paper or plastic wrap. For example, if you will be using contact lenses as part of your design, cover them with plastic wrap.
Next, mix up your plaster according to the instructions on the package and carefully pour it into the mold. You want to make sure that you avoid trapping any air bubbles in the mask by pouring slowly and stopping when needed. If you get an air bubble, simply make a hole in the top of the mask and push the air out before sealing it back up.
Step 4: Remove the Saran Wrap
Once you have successfully removed, the mold, lay it on a flat surface and carefully remove saran wrap. As a final step, take a piece of fine sandpaper and rub it along the edges of your mask to remove any rough spots.
At this point, your mold should be ready for paint as long as there are no other issues with it. For example, if you have an issue with a hole or tear, simply fashion some putty from plaster and glue it to the affected area. When this dries, sand it down smooth and follow the other steps again.
Step 5: Paint Your Mask
You can use many different materials to paint your mask, but we prefer Plaster of Paris for its durability against regular use. Start by cleaning off your mask using warm water and soap. If you used plaster of pairs, you could clean it off by simply rubbing it down a wet paper towel and some dishwashing liquid. If there are any small cracks in the mask, simply fill them in with more Plaster of Paris.
Once your mask is clean and dry, mix five parts water to 1 part Plaster of Paris and apply several thin coats of the mixture until your mask is covered.
Step 6: Pour the Silicone
After your mask has been painted, sand it down to a smooth finish and wipe off any dust with a lint-free cloth. Next, mix the silicone according to its specifications and pour it into your mold. Let it sit for a while and wait until the silicone has completely cured before taking it out of your mold. Next, remove any remaining dust from the mask using a lint-free cloth or a small vacuum cleaner brush.
Step 7: Add the Details and Seal the Mask
Now that you have a nice cast of your actor’s face, it is time to start adding details. You can easily make holes for the eyes and mouth by using an electric drill or pencil sharpener if they are big enough. If not, you will need to use your sculpting tools to carve them out.

Once you have your holes, you are ready to paint your mask. Start by adding small dabs of paint along with the mold. This will make it easier to cover all the tiny grooves in your mask. Continue applying thin layers until you have covered your whole mask, allowing each layer to dry before applying another one.
Step 8: Finishing Touches & Time to Wear!
At this point, you are finished and ready to wear your new mask! Slime it up, add some contacts, and you’re ready to hit the party scene in style. Be sure not to put on any cream-based makeup before putting on your mask, which could cause it to crack.
Please do not copy, modify, or distribute, for commercial or non-commercial purposes, any part of this watch face without the original creator’s explicit permission.
Some Helpful Tips and Suggestions
1. Make sure you fill up as much of the inside of the mask as possible with layers; this will help keep it sturdy and not flimsy.
2. When carving eyes, make sure you put in the exact shape of the eye; this will help make sure that it is realistic.
3. For a more professional look, sketch out your design before using any material or tools on the mask itself. This way, you can practice and see how it will look before doing it on the mask, saving both time and material.
4. When carving your design into the face, take your time! Don’t rush, or you may mess up your work or not place pieces properly.
5. Be sure to use safety gear when handling materials for this project and use tools, such as a rotary tool, for this project to avoid injury.
6. Use the proper tools for each task you plan to complete, such as different diameter drill bits or router bits, depending on what your design calls for. For example, if you want a deep cut, use a smaller bit and if you need something more shallow, use a larger bit.

Safety Measures and Precautions
1. Put on protective gear before beginning work. This includes safety glasses, rubber gloves, and a dust mask.
2. Work in a well-ventilated area and avoid carbon dioxide exposure.
3. Keep chemicals away from open flames and other heat sources because they may cause fire or explosion.
4. Wash hands after finishing work to prevent skin irritation.
5. Ensure a safe work environment before using chemicals or fire, and never smoke while working with chemicals.
6. Avoid getting petroleum jelly on your clothes because it will make its way into your clothing fibers after repeated use, ultimately discoloring the clothes.
You Can Check It Out to: Make a Hollow Mask
Final Thoughts
If you’ve been struggling with how to make a realistic mask from scratch, we have the perfect solution for you. All it takes is some modeling clay and paint! Once you get started crafting your masterpiece, be sure to take note of these tips so that when yours comes out, fabulous everyone will know who did it!
With this guide, you should be able to make your realistic mask. Remember that if the instructions are too difficult for you or seem impossible at any point in time, don’t hesitate to ask someone nearby for help. You can do it! Thanks for reading!
Nancy Behan
Nancy is an embroidery artist, fashion blogger and a full time editor at DIY quickly. Nancy edits the fashion section on DIY quickly, focusing on the embroidery and cross stitch articles, alongside with fabric and other costume design elements. She graduated from the University of Michigan with a Bachelor of Arts in Art History. She loves to work on her own projects, read books and watch romantic movies in her spare time.