How to Fix Paint Chips on Wall Without Paint
You are looking for a quick, easy way to fix paint chips on the wall without painting. You don’t have time to do it right now, but you want your home or business to look great in all its glory. There are a few ways to fix paint chips on the wall without painting. One way is to use a putty knife or sandpaper to smooth out the edges of the paint chips. Another way is to use a small brush to paint over the chips.
Well, if that is the case, then this blog post is perfect for you! We will show you how to fix paint chips on wall without painting and give some tips about what materials you need before we get started. The first thing you need to do is gather all of the materials that you will need for this project.
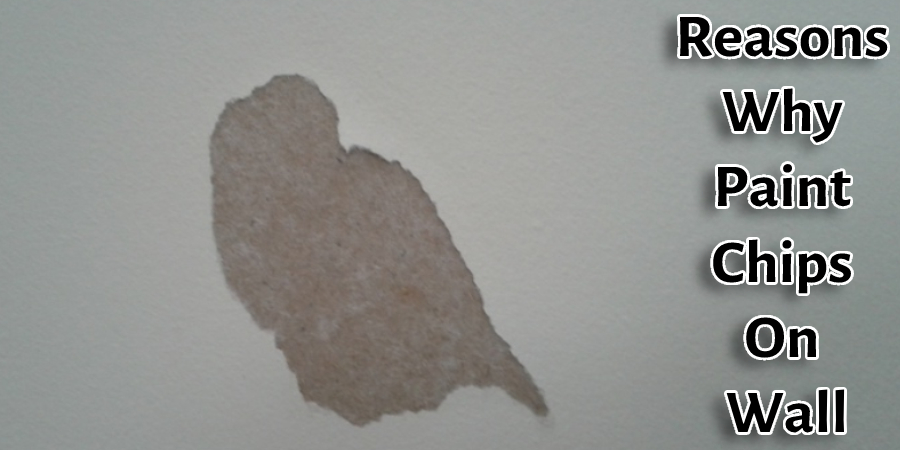
Reasons Why Paint Chips on Wall
The most common reason for your walls having paint chipping is exterior elements such as moisture or extreme temperatures from sun exposure. If this is not the case, then there are other causes that might be at play, and it’s up to you to discover what those reasons may be before proceeding with fixing these types of problems! The first thing you should do is inspect your walls for any peeling paint. If there is any, then you need to scrape it off and sand the area down until it’s smooth. Once that’s done, you can apply a new layer of paint or primer to the affected area.
One thing worth mentioning about painting over a small area, however, is if it was done too quickly without applying enough coats of finish coat meaning that there were still some dried patches left behind and this will lead to an uneven surface when applied all together which can also result in paint chipping. To ensure a good paint job and to avoid having to repaint the entire structure, it is best to remove any paint that has already been applied in areas that will be painted over.
The chips damage the paint on your walls. It could be due to a variety of reasons, like dust particles that get stuck in between the layers or children who love to rub their hands against it while playing with paints. Whatever may be the case, these bits and pieces can’t stay there forever because they will completely ruin the wall’s surface! To remove the paint chips from your walls, start by gently scraping them off with a putty knife. If the chips are too stubborn, you can use a heat gun to loosen them up.
List of Materials You’ll Need
- A bucket of water
- Bleach or ammonia
- Rag, sponge, paper towel
- Scrubbing brush
- Shop vacuum or wet cloth
- Damp rag for cleaning the walls

Instructions: How to Fix Paint Chips on Wall Without Paint
Step One
To clean your walls, make a mixture of water and bleach or ammonia to create an effective cleaning solution that will remove any dirt from the area. Then, pour a small amount of the solution into your scrubbing pot.
Step Two
Brush this mixture on top of any paint chips that you want to fix. Mix it around with your scrub brush so that it will cover all areas where you need to apply the mix.
Step Three
Repeat if necessary until all the paint has disappeared from the wall. Remember, do not leave this liquid sitting for too long because it can damage your walls! After just a few minutes, clean off excess moisture by wiping it up with paper towels or using a damp cloth before proceeding to step three below.
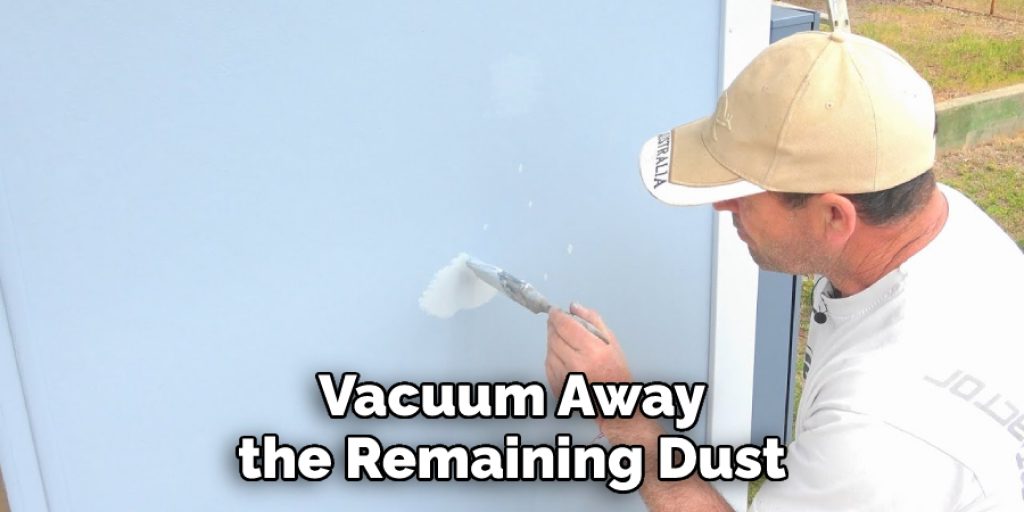
Step Four
Vacuum away the remaining dust left behind after cleaning out any leftover traces of old paints, and then let dry overnight (or longer) before applying new coats of paint.
Step Five
The next day, touch up any areas of your walls or trim that have been damaged by the presence of water and bleach/ammonia’s corrosive effects with a fresh coat of paint.
Step Six
Now that you’re done fixing the paint chip issue, and it’s time to start putting everything back in place take care not to make any more mistakes! It may be difficult at first, but practice makes perfect.
Some Tips & Tricks
Tip 1: The mix is always better than paint because the ingredients are more stable and don’t dry out as quickly. Try to purchase a high-quality stone sealant that will last for years if you plan on doing this again in the future.
Tip 2: If it’s not possible or practical to put up protective barriers like plastic sheets, use a paintbrush to mask off the area and then brush on the mixture.
Tip 3: Thoroughly clean up all of your tools after you’re done, as these paints are highly toxic if ingested or inhaled.
Tip 4: If you are still having a problem with paint chips after following these steps, please contact your local home improvement store.
Tip 5: If your paint chips are on the ceiling, then use a small brush and apply a coat of paint to it. Once dry, you can wipe away any excess with a damp cloth or paper towel.
Other Alternative Ways To Fix Paint Chips
- Fix the paint chip with clear nail polish. You can also use a toothpick or needle to apply it around the edges of the chipped area and in between any cracks that should be sealed up tightly.
- Use wax crayons like you would regular crayons for drawing on walls, but instead, draw over top of where there is an exposed piece of drywall. This will cover up your repair job until you’re able to get some fresh paint put back on!
- If all else fails, try using bookshelf paper as a temporary fix. This may sound farfetched at first, but if applied directly onto the wall surface without messing anything else up (or even touching), it could do the trick. Covering the chipped area in bookshelf paper is a quick way to get your damage fixed up without taking too much time!
- You don’t actually need paint. It’s just one of many ways you can fix chips on walls. If you’re not sure about which method will work best for what type of wall surface has been damaged, ask someone who knows more about home improvement than you do – they’ll be happy to help!
Precautions To Take
- You should not use this method on areas of the wall that are sensitive to moisture or any other types of damage.
- Do not apply water near electrical outlets, switches, or light fixtures in your home; these can be damaged with too much exposure to water.
- Do not attempt to repair paint chips if you have a history of asthma (or other respiratory conditions). The risk for dangerous fumes is high and could trigger an attack.
- Do not use this method with an area of the wall that has recently been painted. You should wait at least six months before applying water in order to allow adhesives used during painting to set and become more durable.
- If the paint chip being repaired has come in contact with anything, discard it at once to avoid the spread of infection or disease.
Frequently Asked Questions
Can I Paint Over Chipped Paint?
No, you must remove the paint chips first.
How do I Remove Paint Chips?
Use a putty knife to scrape away as much of the excess paint on top with your fingers so that it’s flat and thin enough to snap off (optional). Then use a utility blade or razor blade scraper (with blade guard) and cut through the bottom edge of where the chipped pieces are located. Clean up any remaining residue with sandpaper or steel wool after breaking them free from their base surface.
Conclusion
We hope you now have a clear idea of how to fix paint chips on wall without painting. You just need a few household items and work gloves for this project.
The best thing about these solutions is that they are easy to do and inexpensive. So you’ll never find yourself in this sticky situation again! Do you know any other tricks? Let us know which one is your favorite in the comments section.
You may read aslo: